How to Test Backpack Strap Strength Before Bulk Production
A backpack strap rarely fails because of one weak material in isolation. The shoulder strap shell, foam, load-bearing webbing, stitching, reinforcement patch, back-panel fabric, buckle, and attachment geometry work as one system. A webbing test can show that the tape itself is strong, yet the finished backpack may still fail where the strap enters the body.
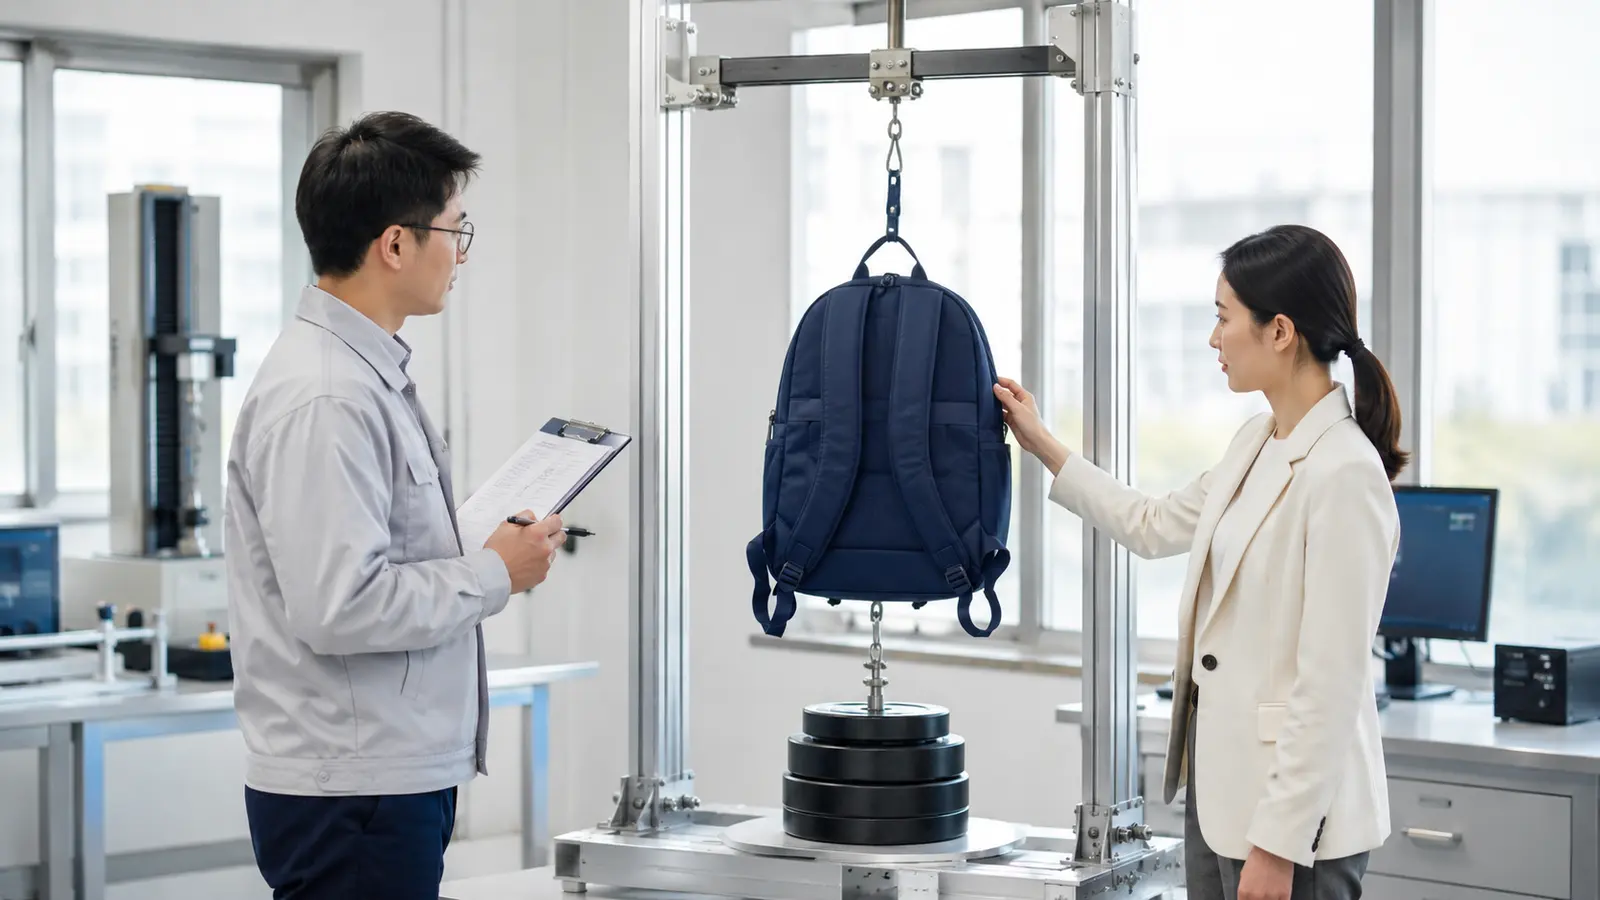
Quick Answer: Test backpack strap strength by defining the intended maximum payload first, then validating the complete carrying system under an agreed static load, dynamic or jerk load, and repeated-lift cycle. Inspect both shoulder straps, the top handle, lower anchors, webbing, buckles, reinforcement layers, and surrounding fabric. Record the load, duration, cycle count, fixture, conditioning, failure criteria, sample quantity, and result. There is no universal kilogram value that fits preschool backpacks, school laptop bags, team backpacks, and equipment bags. The correct requirement must match the product’s declared use and be approved before sampling and bulk production.
Why Strap Strength Must Be Defined as a System
Buyers often ask, “Can this backpack hold 20 kg?” That question sounds precise, but it leaves several critical variables open. Is the load placed evenly inside the bag? Is the bag hanging from one shoulder strap, both straps, or the top handle? Is the weight applied once for a minute, held for several hours, or lifted thousands of times? Is the expected outcome no breakage, no visible damage, or no measurable permanent movement?
The same backpack can pass one version of the test and fail another. Static hanging evaluates sustained load. A jerk or drop action introduces a peak force higher than the dead weight. Repeated lifting reveals fatigue that a one-time pull may miss. A tensile machine can find the ultimate force at which an attachment breaks, but a destructive break test is not the same as a pass/fail endurance test on production units.
For this reason, a useful purchase specification needs six connected decisions:
- the backpack’s intended use and maximum declared content load;
- the carrying component and direction being tested;
- the applied test load or force;
- the duration, movement, or number of cycles;
- the allowed deformation and prohibited failure modes;
- the sample stage, sample quantity, and disposition after testing.
JIUMU’s Durable School Backpacks guide explains why shell denier alone cannot compensate for weak carrying points. Strap testing converts that design principle into evidence.
Where Backpack Shoulder Straps Usually Fail
The visible padded strap is only one part of the load path. When a backpack is lifted, force travels from the contents through the body panels and internal reinforcement into the upper anchors, strap assembly, adjuster webbing, buckles, and lower anchors.
| Failure location | What the buyer may observe | Likely contributing factors | Inspection response |
|---|---|---|---|
| Upper shoulder-strap root | Stitches open, fabric tears, anchor pulls away | Small reinforcement area, short insertion, weak back panel, poor stitch formation | Open the sample or review construction; test complete attachment |
| Lower webbing anchor | Webbing pulls out or stitches migrate | Insufficient overlap, few stitch rows, poor back-tacking, edge too close to seam | Measure insertion and reinforcement; pull in actual load direction |
| Padded strap body | Foam splits, shell wrinkles, binding separates | Foam too soft or brittle, narrow binding bite, uneven feed | Flex and load complete strap; inspect after cycling |
| Webbing | Tape elongates, abrades, or breaks | Wrong webbing specification, edge damage, heat-cut damage, low breaking strength | Test incoming webbing and inspect cut edges |
| Ladder-lock adjuster | Webbing slips or buckle cracks | Incompatible webbing thickness, wrong threading, sharp hardware edge, brittle resin | Mark starting position; cycle under load; inspect buckle |
| Top handle | Handle root tears or handle elongates | Decorative handle treated as load-bearing, narrow reinforcement, weak core | Test separately using intended lift direction |
| Back-panel fabric | Fabric tears around intact stitches | High stitch concentration, insufficient backing, low tear strength | Review stitch density and reinforcement footprint |
| Thread or stitch line | Thread ruptures or skipped stitches propagate | Thread size, tension, needle damage, stitch density, poor locking | Examine first piece and compare with approved seam standard |
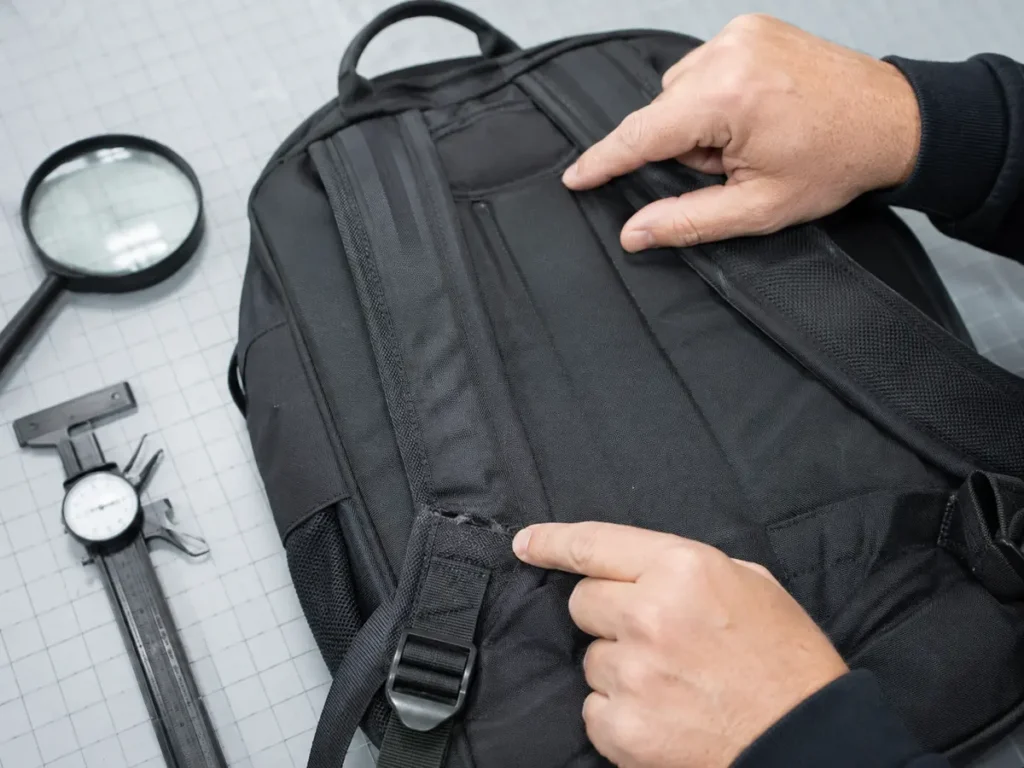
Failure evidence should be recorded by mode, not only as “pass” or “fail.” A broken thread suggests a different corrective action from torn shell fabric, webbing slippage, buckle fracture, or anchor movement. Photographs should show the entire backpack, the tested component, the fixture, and a close view of any change.
What Materials Control Shoulder-Strap Performance?
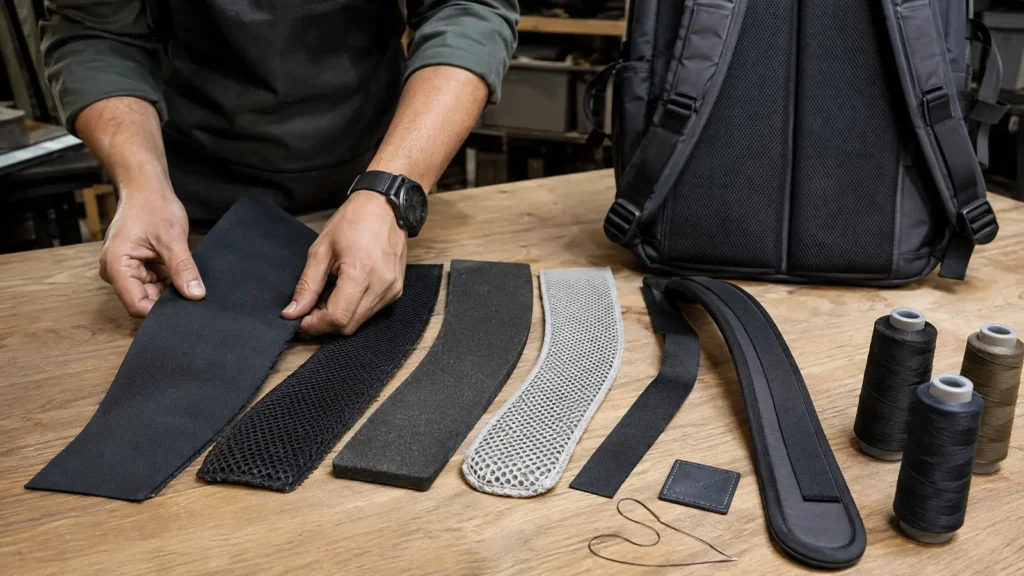
Outer fabric and spacer mesh
The strap face and back materials hold the shape, protect the foam, and resist abrasion. Spacer mesh can improve surface comfort, but it should not be assumed to carry the entire structural load. If the shell and mesh are not connected to a load-bearing internal layer, the anchor may depend on materials selected mainly for appearance or comfort.
Foam
Foam distributes pressure and gives the strap body. It is not normally the primary tensile member. Very soft foam can compress and allow the strap to fold; brittle foam can crack during repeated flexing. Check thickness, density or agreed foam specification, compression recovery, edge taper, and behavior after cycling.
Load-bearing webbing
Webbing often connects the padded strap to the lower anchor or reinforces the entire load path. Specify fiber, width, thickness, weave, color, finish, supplier article, and required breaking strength or elongation where relevant. ASTM D6775 covers the breaking strength and elongation of textile webbing, tape, and braided material using defined grips. That component result does not prove the finished anchor, but it helps prevent an under-specified tape from entering production.
Reinforcement patches
A reinforcement layer spreads force beyond the visible stitch pattern. It may be woven fabric, webbing, a synthetic reinforcement sheet, or a multilayer construction. Its size, orientation, edge distance, and connection to the back panel matter. A small hard patch may simply move the failure to its edge.
Sewing thread
Thread must be compatible with the fabric, seam, needle, and machine. Stronger or thicker thread is not automatically safer: an overly concentrated stitch line can perforate or cut a weaker shell. Production control should include thread type and size, stitch density, tension, needle selection, start/stop security, and absence of skipped stitches.
Box-X, Bartack, and Other Reinforcement Patterns
Box-X and bartack are familiar construction terms, but neither is a universal answer.
Box-X stitching
A box-and-cross pattern can distribute load over a relatively broad rectangular area. It works best when the webbing or strap tab has enough insertion length, the surrounding fabric has suitable reinforcement, stitch corners are controlled, and the box does not sit too close to a cut edge or seam allowance.
Potential risks include uneven corner tension, poor stitch locking, a box that misses the internal backing, or a dense crossing point that damages the material. The pattern should be measured and connected to a written construction drawing or approved sample.
Bartack reinforcement
A bartack creates a dense group of stitches across a localized stress point. It is useful for securing webbing ends and reinforcing load transitions. Its width, length, stitch count, thread, orientation, and backing must match the material.
More stitches are not always better. Excessive density can create a perforation line, distort coated fabric, or make a stiff edge that concentrates stress. A bartack placed across the wrong load direction may also underperform.
Multiple rows and hybrid structures
Parallel rows, box stitches with added bartacks, folded webbing tabs, and seam-integrated anchors may all be suitable. The best construction is the one that transfers the specified load through a sufficiently large, reinforced area without causing unacceptable damage during the agreed tests.
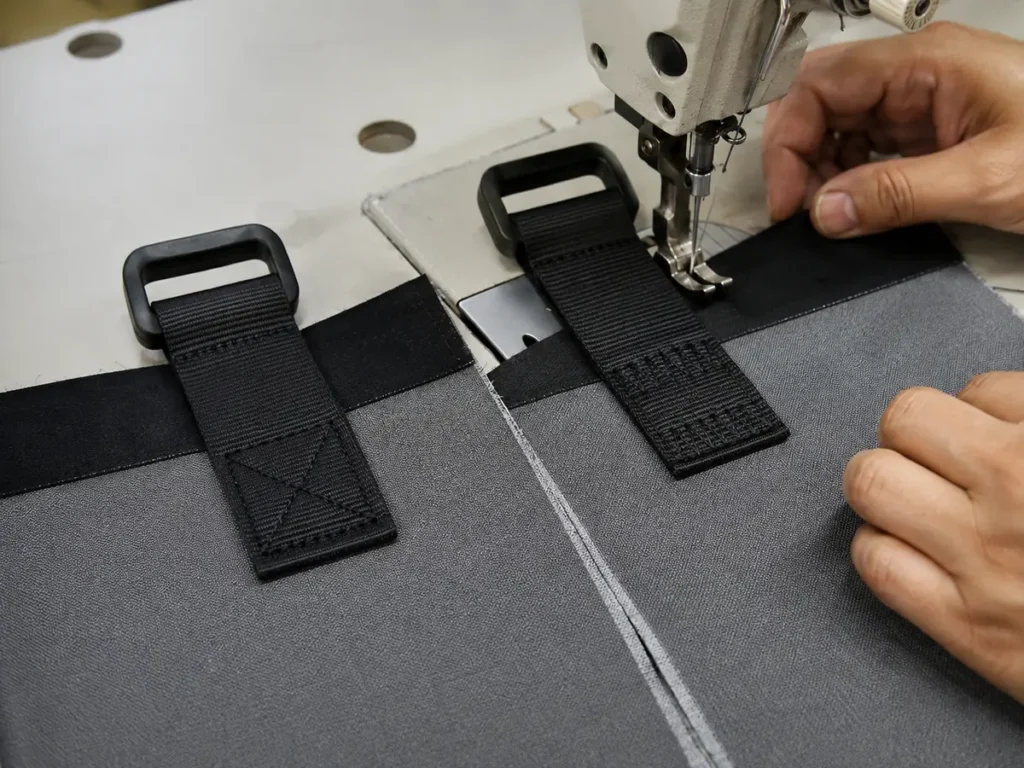
ASTM D1683/D1683M measures the failure of sewn seams in woven fabrics under a controlled force applied perpendicular to the seam. It can support material and seam development. A complete backpack anchor, however, may have complex geometry, several material layers, and a different load direction. Buyers should use standardized component tests where applicable and a separately written finished-product protocol for the actual backpack.
How Much Weight Should a Backpack Strap Hold?
There is no responsible universal answer. The specification should begin with the product’s intended maximum content load, not a marketing number copied from another backpack.
A preschool backpack, everyday primary-school bag, laptop backpack, sports backpack, and equipment pack have different volumes, users, contents, construction, and misuse risks. A high destructive break force does not mean the bag should be advertised for that load. User guidance, ergonomic load advice, declared payload, and laboratory test load are different values.
A practical specification method
Let L represent the intended maximum content load. The buyer and supplier can agree on a test load based on L plus a defined test margin appropriate to the product and risk. The agreement must state the margin rather than assume one industry-wide safety factor.
For example, the specification can define:
- nominal content load: the load the design is intended to carry in normal use;
- static proof load: the agreed load held for a defined time without prohibited damage;
- cyclic test load: the load used during repeated lifts or oscillation;
- ultimate pull test: a destructive force-to-failure evaluation performed on development samples when required;
- claim limit: the maximum load communicated to users, if the buyer intends to make such a claim.
These numbers may be different. The test report should never convert a destructive result directly into a user carrying recommendation without a documented engineering and compliance decision.
Static Load Testing
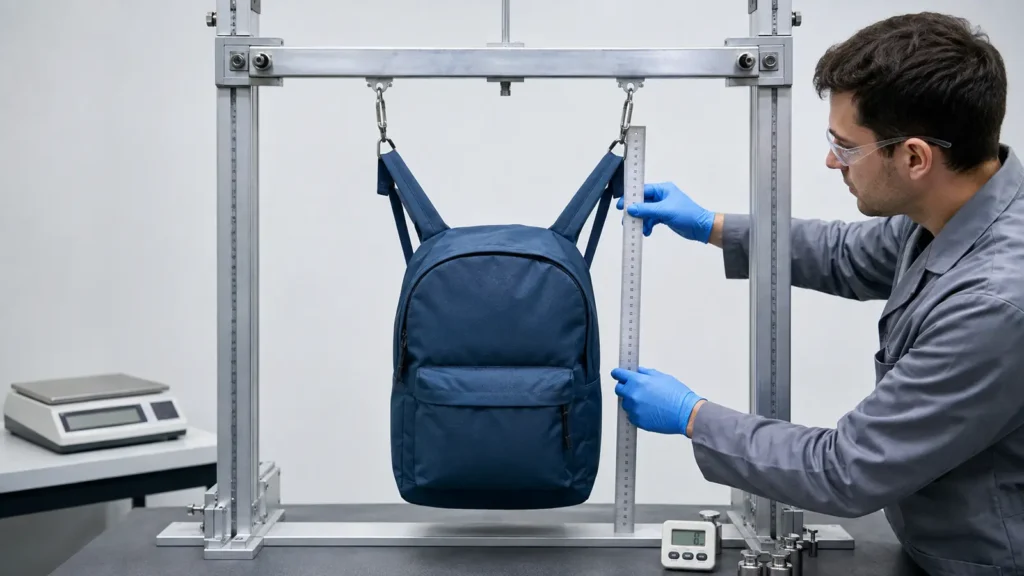
A static load test asks whether a carrying component can support a defined sustained load. It is useful for detecting immediate anchor weakness, webbing slippage, seam opening, or progressive deformation.
Minimum fields for a static test
- Test sample identity and conditioning.
- Load material and how it is distributed inside the bag.
- Filled weight and measurement tolerance.
- Zippers or closures used during the test.
- Component used for suspension: both straps, one strap, or top handle.
- Fixture geometry, hook shape, and load direction.
- Ramp-up method or how the load is applied.
- Hold time.
- Inspection intervals.
- Maximum permitted slippage or permanent movement.
- Prohibited failures.
- Recovery time before final inspection.
Why fixture details matter
A narrow metal hook can cut into a handle or place an unrealistic point load on a padded strap. A very wide support may spread the load more gently than a human shoulder. The report should describe or photograph the fixture so another party can reproduce the test.
Static testing is often non-destructive when the load and criteria are set as a proof test. Do not return a heavily tested sample to ordinary production inventory without an agreed disposition. Repeated or high-load testing can create hidden fatigue even when the unit still looks acceptable.
Dynamic, Jerk, and Repeated-Lift Testing
Static loading alone is not enough for backpacks that will be repeatedly picked up, swung onto a shoulder, dropped onto a bench, or carried while walking or running. Acceleration changes the peak force and cycling accumulates damage.
Dynamic or jerk testing
A jerk-style test subjects a loaded bag to controlled lifting and dropping or sudden load application through the handle or straps. The method needs the drop or travel distance, cycle rate, load, fixture, component, and number of cycles. Uncontrolled manual shaking is useful only as an informal development check; it is not a reproducible contractual test.
Repeated lifting
A cyclic lift test raises and lowers the loaded bag at a defined speed and amplitude. It can reveal thread fatigue, seam migration, webbing slippage, buckle wear, foam breakdown, and damage around the anchor that does not appear in a one-time static hang.
Oscillation or swing testing
An oscillation protocol can create alternating directions and simulate movement. Record the arc or displacement, frequency, load distribution, and cycle count. Ensure the machine does not introduce a sharp edge or twist that is unrelated to normal use unless misuse is intentionally part of the requirement.
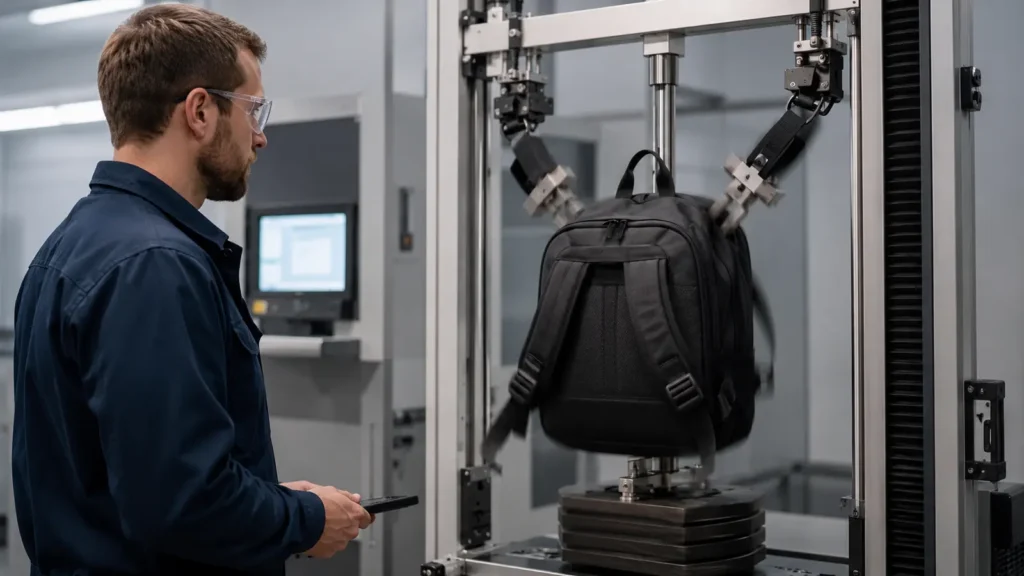
CTC identifies NF G 92 005 as a method for evaluating the pulling strength of straps, shoulder straps, or their attachment to luggage and leathergoods using a dynamometer. CTC also lists NF G 92 008 for resistance to cyclic stress under load. The buyer should confirm the current standard edition, scope, specimen setup, and laboratory capability rather than quoting only a standard number.
How to Test Top Handles, Buckles, and Adjustment Points
Top grab handle
Test the handle separately if users will regularly lift the full bag from it. Check the handle body, reinforcement core, root stitching, panel fabric, and internal backing. Pull in the direction created during real lifting. A handle intended only for hanging an empty bag should be described differently from a load-bearing carry handle.
Ladder locks and adjusters
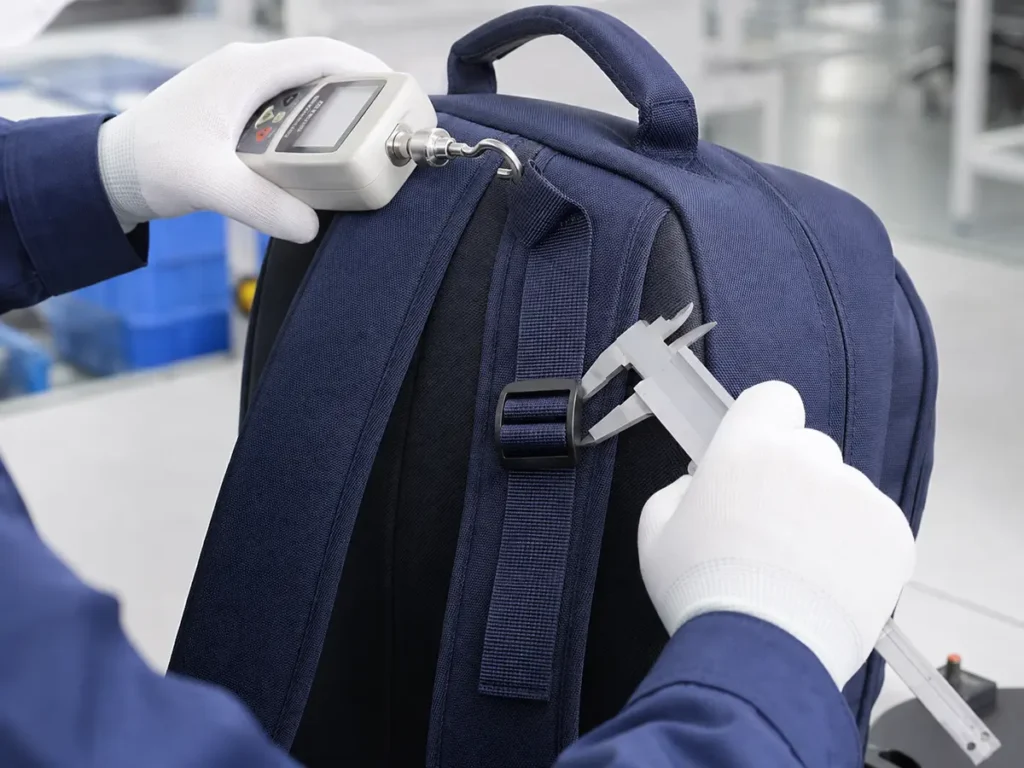
Mark the webbing position before the test. Apply the specified load and cycling, then measure slippage. Inspect the buckle for cracks, whitening, sharp edges, deformation, and loss of locking function. Verify that the webbing width and thickness match the hardware and that the tape is threaded through the correct path.
Lower anchor and loose tail
The adjustable webbing should have enough insertion or turn-back length to resist pull-through. Check that heat-cut edges do not become brittle or sharp, stitching does not sit too close to the end, and the loose tail remains usable through the adjustment range.
Metal rings, hooks, and swivels
Where present, inspect opening, plating damage, permanent deformation, burrs, and attachment to the textile. Hardware testing should reflect the complete assembly rather than an isolated component certificate alone.
A Buyer-Ready Strap Test Specification
| Specification field | What to define | Why it matters |
|---|---|---|
| Intended use | Preschool, school, laptop, team, travel, equipment, promotional | Determines credible load and cycling scenario |
| Maximum content load | Declared normal-use load and units | Establishes the design baseline |
| Test component | Both straps, one strap, handle, lower anchor, buckle | Different components see different forces |
| Test type | Static proof, cyclic lift, jerk, oscillation, pull to failure | Prevents “load tested” from remaining vague |
| Test load or force | Value, tolerance, loading rate where relevant | Makes the requirement reproducible |
| Duration or cycles | Hold time, rate, amplitude, cycle count | Separates a momentary test from fatigue testing |
| Fixture | Hook width, support shape, orientation, clamping | Fixture can change the result |
| Sample condition | Temperature/humidity conditioning, packed state, closures | Controls repeatability |
| Measurements | Anchor movement, webbing slip, seam opening, deformation | Provides objective evidence before/after |
| Failure criteria | Breakage, tear, stitch rupture, slip, crack, unacceptable deformation | Defines pass/fail before the test |
| Sample quantity | Development, pre-production, and bulk quantities | Connects evidence to order risk |
| Sample disposition | Destructive, retained, quarantined, or scrapped | Prevents tested units entering saleable stock |
Need a testable backpack specification? Send JIUMU the backpack type, target user, intended contents, dimensions, quantity, materials, maximum content load, logo, packaging, destination, and delivery date. Ask for the strap test conditions and sample stage to be included in the quotation. Contact JIUMU or email zhengdong@jiumugear.com.
Prototype Validation Before Bulk Production
The strength test should begin during development, not after the shipment is packed.
Stage 1: material and component review
Confirm shell and lining fabrics, reinforcement, foam, mesh, webbing, thread, and hardware. Review available test data for the actual supplier articles. If webbing breaking strength is important, use a defined method such as ASTM D6775. If sewn-seam behavior is being compared, use a relevant seam method such as ASTM D1683/D1683M where its scope fits.
Stage 2: construction sample
Open or partially section a development sample when necessary to verify hidden insertion lengths, reinforcement size, seam allowance, and stitch placement. A visually clean exterior does not prove that the stitching reached the backing layer.
Stage 3: complete prototype test
Load the finished backpack and conduct the agreed static and dynamic sequence. Test every declared carrying mode. Measure anchor positions before and after. Operate adjusters and inspect all nearby seams.
Stage 4: correction and retest
If the sample fails, identify the failure mode and correct the load path. Adding more stitches without understanding the failure can make the fabric tear sooner. Update the tech pack, bill of materials, construction drawing, test specification, and sample version.
Stage 5: Golden Sample approval
The final approved sample should be linked to the test record and specification version. Buyer and supplier should retain controlled references where practical. JIUMU’s Prototype Approval guide explains how to connect the physical sample to measurable production requirements.
Bulk Production Inspection
Prototype approval does not prove that every bulk unit has the same reinforcement and stitch formation. Create controls at three levels.
Incoming and setup checks
Verify webbing article, width, thickness, color, buckle article, thread, reinforcement, and fabric. Confirm sewing-machine setup and operator reference. Check the first strap assemblies before they are closed into the bag.
First-piece and in-line inspection
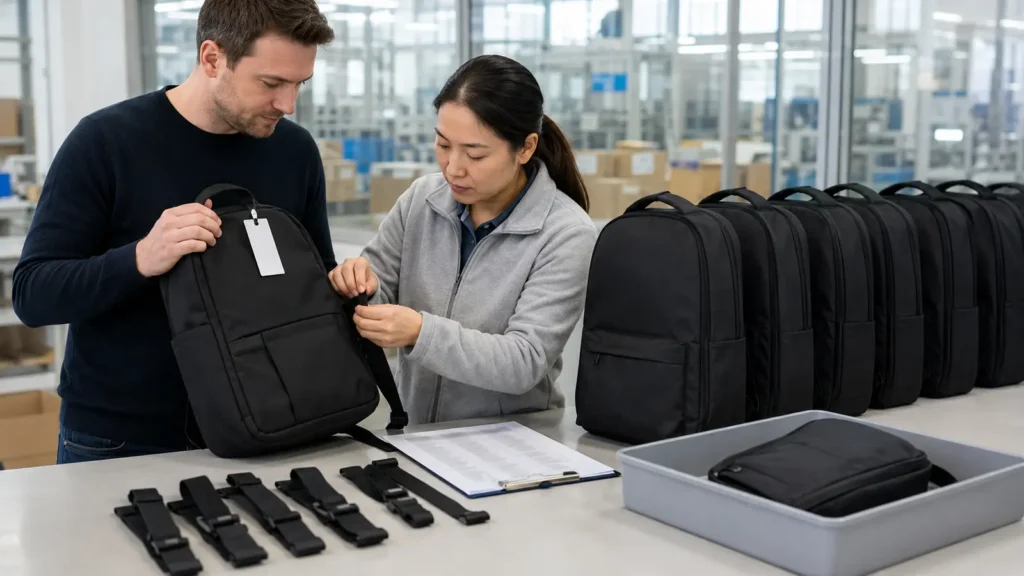
Compare the first completed units against the Golden Sample and construction record. Inspect stitch pattern, insertion length, symmetry, buckle threading, strap length, anchor position, skipped stitches, needle damage, and handle alignment. Use in-line destructive opening or pull checks when the agreed plan requires them.
Final inspection and test sampling
Select samples using a documented lot and sampling plan. ASQ explains that ANSI/ASQ Z1.4 provides attribute acceptance-sampling plans and procedures; acceptance sampling evaluates a sample from the lot rather than guaranteeing that every unit is defect-free. Functional or destructive strap tests may use a separate sample quantity from visual workmanship inspection because tested units may no longer be saleable.
JIUMU’s Quality Control page describes the broader incoming, in-process, final-product, dimensional, color, and packing controls that can surround a backpack test plan.
What Counts as a Strap-Test Failure?
Define defects before testing. Possible failure criteria include:
- complete detachment of any carrying component;
- thread rupture or skipped-stitch propagation;
- shell, lining, mesh, or reinforcement tearing;
- webbing breakage, edge damage, or pull-through;
- buckle fracture, release, or permanent deformation;
- adjuster slippage beyond the allowed measurement;
- anchor movement or seam opening beyond tolerance;
- foam fracture or binding separation that affects use;
- a sharp edge, exposed reinforcement, or other safety concern;
- loss of function after the recovery period.
A cosmetic change may be minor in one product and unacceptable in another. Record defect class—critical, major, or minor—only after the buyer defines its meaning and disposition.
What to Do When a Sample or Bulk Unit Fails
Contain
Stop release of affected material or units. Identify the production lot, line, operator, component lot, and time window. Segregate tested and suspect units.
Diagnose
Record where failure began, force or cycle at failure, and the material or stitch involved. Compare with the approved sample. Open the construction if necessary. Ask whether the failure is isolated or systematic.
Correct
Correct the root cause: material specification, reinforcement footprint, insertion length, seam allowance, stitch pattern, thread/needle setup, buckle compatibility, fixture, or handling. A cosmetic repair to the broken sample does not validate the lot.
Retest
Use the same documented protocol unless the buyer approves a justified revision. Test new representative samples after correction. If the protocol itself was unclear, revise it in writing and explain how previous results will be treated.
Decide lot disposition
Options may include 100% screening, rework followed by reinspection, additional sampling, concession for a clearly limited nonfunctional issue, replacement, or rejection. The buyer and supplier should agree on authority, cost responsibility, timing, and evidence before shipment.
Common Strap-Testing Mistakes
Testing only the webbing
Strong tape can be attached to weak fabric. Test the finished load path as well as critical components.
Quoting only a weight
“Passed 20 kg” does not state the component, duration, motion, cycles, fixture, or damage criteria. Require the full protocol.
Assuming static load proves fatigue life
A backpack can hang safely once and fail after repeated lifting. Add cyclic testing for repeated-use products.
Pulling in an unrealistic direction
Fixture orientation can make a test artificially easy or severe. Match normal use first, then add defined misuse scenarios if required.
Over-stitching the anchor
Dense stitches can weaken the fabric by perforating it. Balance thread, needle, stitch density, reinforcement, and material.
Testing a sample made with substitute materials
A prototype using temporary webbing, buckle, reinforcement, or shell cannot approve production strength. Retest the production-intent construction.
Returning tested units to inventory
Destructive and severe endurance tests may leave hidden damage. Mark and control the tested samples.
Changing the protocol after seeing the result
Test conditions and acceptance criteria must be approved before the result is known.
Questions to Ask a Backpack Supplier
- What carries the structural load inside the padded shoulder strap?
- What are the webbing width, thickness, fiber, weave, and article number?
- How far do the upper and lower anchors extend into the reinforced area?
- What backing or reinforcement is used behind each attachment?
- Is the stitch pattern Box-X, bartack, multiple rows, or another controlled design?
- Which thread, needle, stitch density, and seam allowance are specified?
- How is the top handle designed and tested?
- How much adjuster slippage is permitted under load?
- Which component tests and finished-product tests are proposed?
- What load, duration, cycles, amplitude, and fixture will be used?
- What failure modes define rejection?
- How many development, pre-production, and bulk samples will be tested?
- Are tested units excluded from shipment?
- What corrective-action process applies if the sample or lot fails?
Review JIUMU’s Manufacturing Capabilities when coordinating backpack sampling, materials, decoration, packaging, production, and inspection within one project.
What Buyers Should Send for a Quotation
Send the backpack use case, target user, external dimensions or capacity, intended contents, maximum normal-use load, expected service frequency, fabric and lining, foam, webbing and hardware direction, strap dimensions, top-handle purpose, required test method or buyer protocol, acceptance criteria, quantity, colors, logo files, labels, packaging, destination, and delivery date.
If no formal test has been selected, provide the real use scenario rather than guessing a standard number. The supplier and laboratory can then propose a method for written approval. JIUMU supports OEM/ODM development, material sourcing, digital mockups, physical samples, embroidery, printing, patches, labels, packaging, quality control, and export support. Typical MOQ is 50 pieces, subject to product structure and customization.
Turn “strong straps” into a measurable requirement. Share your backpack concept, quantity, load scenario, construction, logo, testing, packaging, destination, and deadline with JIUMU. Call +86 18507502899, email zhengdong@jiumugear.com, or request a custom quotation.
Frequently Asked Questions
Sources and Technical References
- ASTM D6775-13(2024) — breaking strength and elongation of textile webbing, tape, and braided material.
- ASTM D1683/D1683M-22 — failure in sewn seams of woven fabrics.
- CTC: pulling strength of straps and shoulder straps — luggage and leathergoods test principle under NF G 92 005.
- CTC physical tests for leathergoods — lists strap attachment and cyclic-stress methods for luggage.
- Bureau Veritas backpack and bag testing — describes strap attachment integrity and related hardware durability testing.
- ASQ: ANSI/ASQ Z1.4 and Z1.9 — acceptance-sampling plans and procedures.
About JIUMU
JIUMU supports OEM and ODM development for custom teamwear, hats, bags and branded merchandise, including material sourcing, samples, decoration, packaging, quality control and export support.