How to Test Zipper Durability on Custom Backpacks
A backpack zipper can feel smooth on an empty sample and still fail after the bag is loaded, repeatedly opened, pulled around a tight corner, or exposed to dust and moisture. For schools, sports clubs, distributors, promotional buyers, and private-label brands, that failure is more than a component problem. A split chain or detached pull tab can make the whole backpack unusable and create replacement, return, and reputation costs.
Reliable zipper approval therefore requires more than opening and closing the sample once. Buyers should define the zipper construction, inspect its individual parts, test operation under realistic conditions, check how the zipper is sewn into the bag, and record an agreed acceptance standard before bulk production.
Quick Answer
To test zipper durability on a custom backpack, evaluate both the zipper and the finished bag. Check the chain or elements, slider, pull tab, tape, stops, and stitching; operate the zipper repeatedly on straight and curved paths; test it while the compartment is realistically loaded; apply agreed strength checks to the chain, puller, stops, and zipper seam; and inspect bulk units against the approved sample. There is no universal cycle count or universally “best” zipper. The correct construction and acceptance criteria depend on the backpack’s load, opening shape, user group, environment, and expected service life.
Why Zipper Durability Must Be Evaluated as a System
A zipper is a system of interdependent parts. The elements or coil must engage correctly. The slider must bring them together without excessive clearance. The pull tab must transmit the user’s force without twisting or detaching. The stops must keep the slider on the chain. The woven tape must hold the elements and accept stitching. Finally, the seam must secure that tape to the backpack panel without distortion.
If any one part is unsuitable, a stronger-looking zipper may still fail. A large molded zipper installed around an excessively tight curve may feel worse than a smaller, more flexible coil zipper. A strong chain sewn with insufficient seam allowance can pull out of the fabric. A custom metal puller may survive a straight tensile check but place excessive leverage on the slider during sideways use.
ASTM D2061 reflects this system approach: it covers multiple strength properties for zipper chains, stops, sliders, and pulls, and explicitly notes that no single test determines suitability for a specific end use. A buyer’s specification should therefore identify the relevant tests and the finished-product conditions rather than asking only for “a strong zipper.”
Know the Parts That Can Fail
| Zipper part | Function | Typical backpack failure | What to inspect or test |
|---|---|---|---|
| Coil or molded elements | Interlock to close the opening | Splitting behind the slider, missing or deformed elements | Engagement, transverse strength, alignment, damage |
| Slider | Opens and closes the chain | Jamming, loose fit, failure to mesh, derailment | Running resistance, body deformation, channel fit |
| Pull tab or custom puller | Gives the user a grip | Pull-off, fracture, sharp edge, uncomfortable use | Pull and twist resistance, edge finish, ergonomics |
| Zipper tape | Carries the elements and stitching | Fraying, tearing, wave distortion | Weave quality, width, coating, needle damage |
| Top and bottom stops | Retain the slider and define travel | Slider runs off the chain | Position, attachment, holding strength |
| Sewing seam | Joins zipper tape to bag panel | Stitch breakage, seam opening, tape pullout | Stitch type, allowance, reinforcement, seam strength |
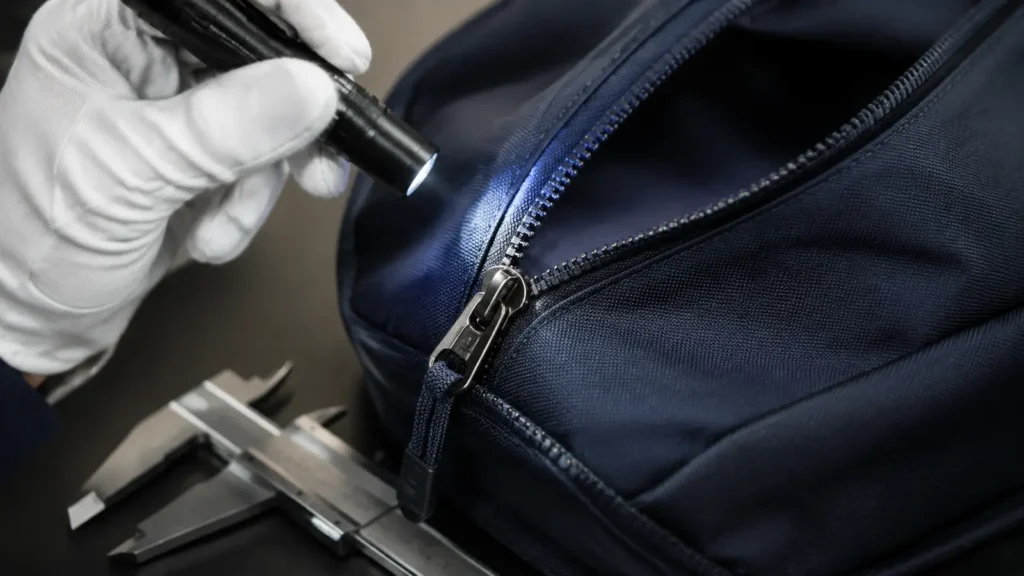
The first sample review should identify every specified component. Record the zipper type, nominal size, tape color, element color, slider type, puller design, opening length, supplier reference, and intended location. Photographs help, but they do not replace physical reference samples or a written bill of materials.
Coil vs Molded Zippers for Backpacks
Coil and molded plastic zippers are both widely used on bags. Neither is automatically better. The right choice depends on the opening path, appearance, required flexibility, abrasion exposure, and load.
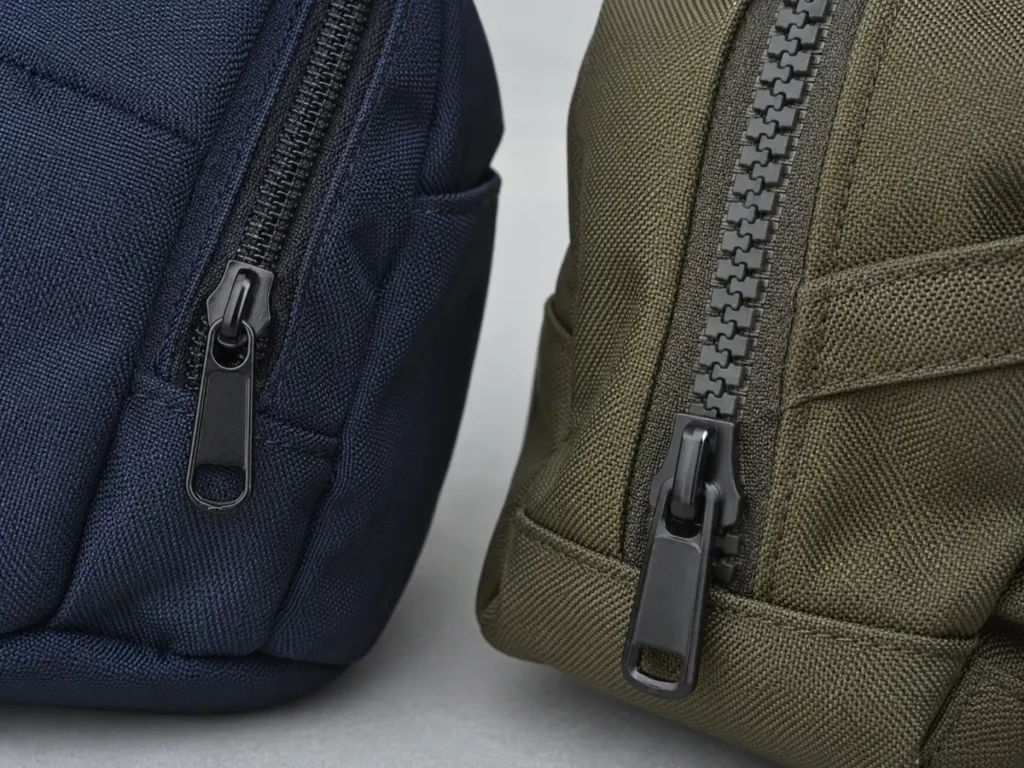
| Criterion | Coil zipper | Molded plastic zipper |
|---|---|---|
| Construction | Continuous synthetic coil sewn to tape | Individual molded elements attached to tape |
| Flexibility | Usually follows curves and compact openings well | Generally more structured and visually pronounced |
| Appearance | Fine, low-profile, suitable for concealed or reverse-coil designs | Chunkier, sporty or outdoor appearance |
| Common backpack use | Main compartments, curved pockets, laptop and organizer openings | Main openings, casual bags, visible statement zippers |
| Debris behavior | Small coil can be sensitive to contamination or fabric catching | Larger gaps may shed some debris, but elements can still damage or misalign |
| Repair implication | Damaged coil or stitching often requires zipper replacement | A damaged molded element can also make the chain unusable |
| Procurement decision | Favor when flexibility and smooth corner travel are priorities | Favor when visible structure and a larger-element aesthetic are priorities |
Metal zippers can be selected for fashion or heritage styling, but weight, corrosion exposure, surface finish, and abrasion against contents require separate review. For a school or sports backpack, component type should be chosen from the actual use case rather than appearance alone.
Are Larger Zippers Always Stronger?
No. A larger nominal size can provide a heavier chain and may improve certain strength properties, but it does not guarantee a more durable finished backpack. Slider quality, tape width, element material, stops, sewing, opening geometry, and user load all matter. An oversized zipper can also add weight, stiffness, cost, and visual bulk.
Ask the supplier to identify the complete zipper specification and the relevant test result, not merely state “No. 8 is stronger than No. 5.” Nominal sizing systems can also vary between manufacturers, so the approved physical sample and measured construction should govern.
Start With an End-Use Test Specification
Before testing, describe how the backpack will be used. A preschool bag with a short straight opening should not automatically use the same acceptance plan as a large team equipment backpack that is opened under load. Define:
- backpack style and finished dimensions;
- target user, such as youth, adult athlete, commuter, or promotional recipient;
- intended contents and realistic working load;
- opening location, length, and curve radius;
- expected frequency of opening and closing;
- indoor, outdoor, rain, dust, sand, cold, or coastal exposure;
- required care method;
- custom slider, puller, cord, or lock features;
- test method, sample conditioning, sample quantity, and acceptance criteria;
- action if a sample or bulk unit fails.
The phrase “heavy-duty zipper” is not measurable. A useful specification states what must be tested, how it will be conditioned, what constitutes a cycle, when inspections occur, and what is considered a failure.
The Core Zipper Durability Tests
1. Visual and Dimensional Inspection
Begin with the simplest checks. Confirm that the chain is straight, tape width is consistent, stops are secure, the slider is correctly oriented, and there are no missing elements, burrs, sharp edges, loose threads, coating defects, or contaminated areas. Measure the installed opening and compare it with the tech pack.
Also look for waviness. A wavy zipper may indicate mismatched feeding, differential stretch between the zipper tape and fabric, excessive sewing tension, or poor pattern geometry. The chain may be sound while installation makes it difficult to operate.
2. Initial Operating-Force Check
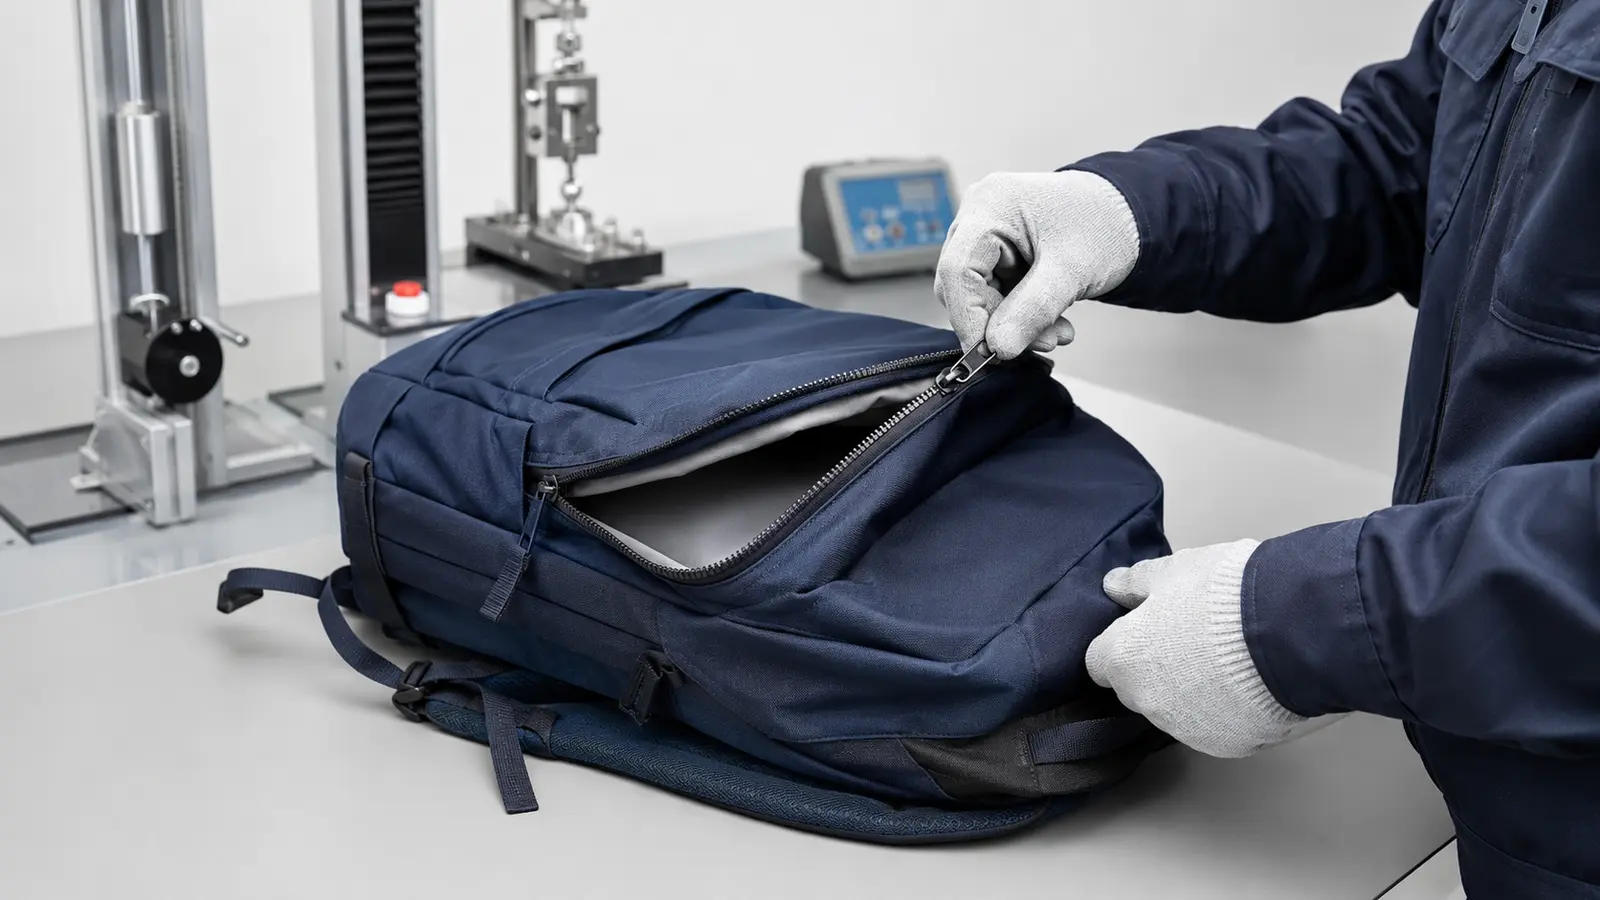
Open and close the zipper slowly through its full travel. Note the starting force, smoothness, local resistance, noise, and any point where lining or seam allowance approaches the slider. Test with the backpack upright, flat, and worn or supported in its intended shape.
For a quantitative program, the buyer and laboratory can specify a method for measuring operating force. If a handheld force gauge is used, define the pulling angle and speed. Numbers from different fixtures are not directly comparable unless the method is consistent.
3. Reciprocating Open-Close Cycle Test
A reciprocating test repeatedly moves the slider through a defined length under controlled conditions. It can reveal increasing friction, slider wear, element damage, stop movement, puller loosening, and chain splitting.
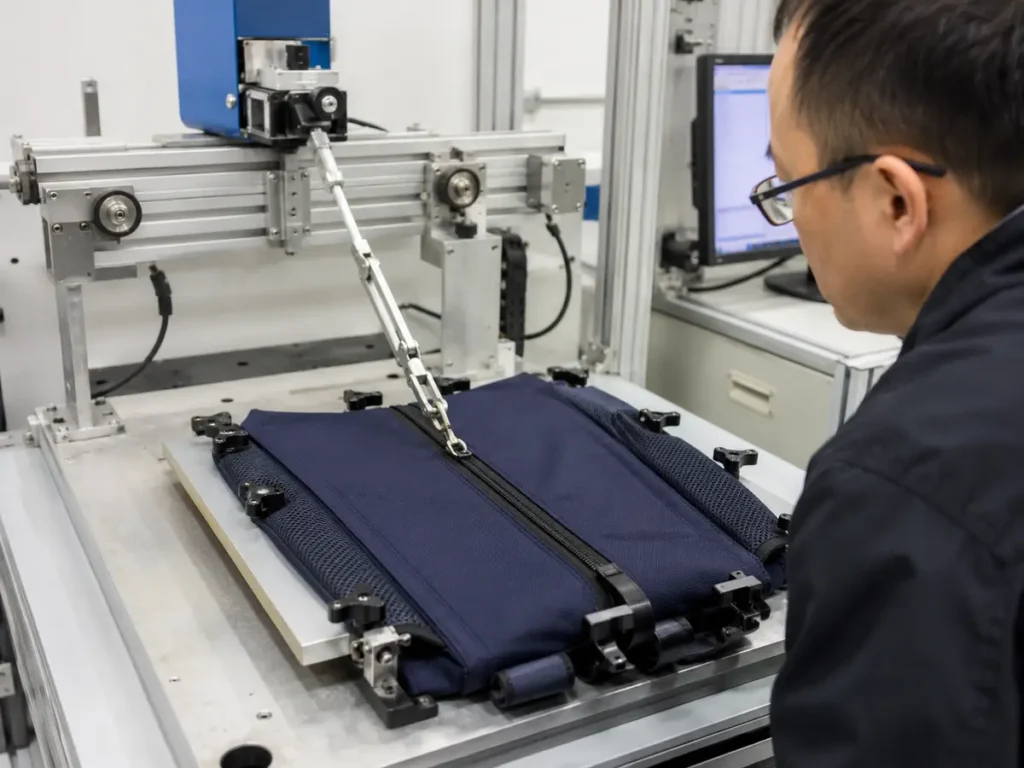
The specification should state:
- whether one cycle means one complete open-and-close sequence;
- test length and whether the slider reaches the stops;
- operating speed and any pauses;
- pre-load or lateral load on the chain;
- whether testing is on loose zipper specimens, sewn panels, or finished bags;
- number of cycles and intermediate inspection points;
- permitted change in operating force;
- failure definitions, such as jam, split chain, detached pull, broken stop, or seam damage.
How Many Cycles Are Needed?
There is no single cycle count suitable for every custom backpack. The buyer should choose a requirement based on expected use, risk, zipper construction, and a recognized or mutually agreed test method. A laboratory number is meaningful only when the fixture, load, travel, speed, conditioning, and failure criteria are also stated.
For product development, it is often more useful to compare candidate zippers using the same method and then validate the selected zipper in the finished bag. If a retailer or institutional buyer has a corporate protocol, include it in the purchase specification rather than replacing it with a factory’s generic cycle claim.
4. Chain and Element Strength
Transverse or crosswise chain strength evaluates resistance to forces that try to separate the two sides. This matters when users overfill a compartment or compress bulky contents. Testing must follow the chosen standard because specimen width, grip position, test speed, and result reporting affect the measurement.
Do not treat chain strength as permission to overpack the backpack. The finished seam, fabric, and panel design may reach their limits first.
5. Slider, Pull Tab, and Stop Strength
The slider body may deform under compression or sideways load. The pull tab may detach under straight, angular, or twisting force. Top and bottom stops can loosen or be incorrectly positioned. ASTM D2061 lists separate methods for several of these properties, reinforcing why “zipper strength” is not one number.
For a backpack, test the pull in the directions users are likely to apply. Children and athletes may grab a long puller from the side, while gloves can encourage higher leverage. Inspect the puller attachment ring and slider bridge after testing, even if the decorative pull remains intact.
6. Loaded-Bag and Curved-Path Test
Laboratory specimens are useful, but the finished backpack adds curves, tension, lining, piping, foam, and panel distortion. Fill the bag with a defined representative load, close it without forcing, and operate each zipper through the complete path. Repeat the check with the bag on a table, upright, and carried if relevant.
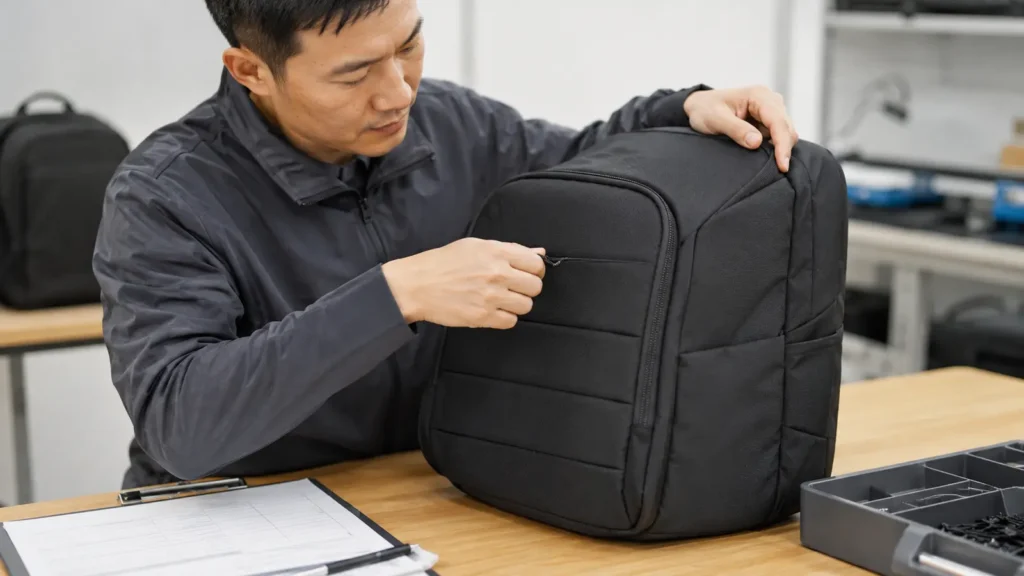
At corners, check for:
- abrupt increases in force;
- slider contact with piping or folded seam allowance;
- lining caught between the slider and chain;
- zipper tape folding inward;
- separation behind the slider;
- puller collision with hardware;
- excessive tension caused by overfilled panels.
A small pattern change, wider sewing allowance, smoother radius, zipper guard, or adjusted foam termination can solve a problem that a larger zipper cannot.
Test the Zipper-to-Fabric Seam
Many apparent zipper failures are actually seam failures. The chain stays closed, but the tape pulls out, stitching breaks, or the backpack fabric tears beside the seam.
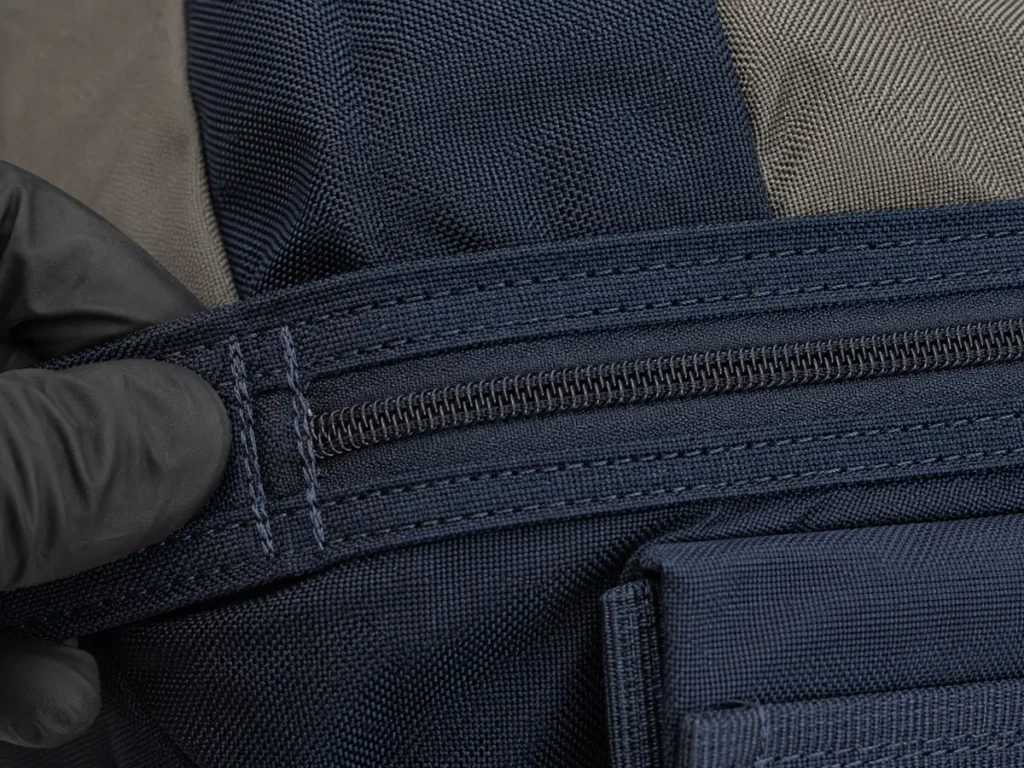
Review the seam for stitch density, balanced tension, adequate tape bite, seam allowance, backtacking or bartacks where appropriate, and protection of raw edges. Avoid placing needle holes too close to the zipper elements. On coated fabrics, repeated needle perforation can create a tear line or water-entry path.
A finished-panel seam test can apply force across the zipper installation while observing whether failure begins in the thread, tape, fabric, or seam construction. Record the failure mode, not only the peak result. That information tells the development team what to change.
Seam Failure Diagnostic Table
| Observation | Likely cause to investigate | Possible corrective direction |
|---|---|---|
| Thread breaks but tape and fabric remain intact | Inadequate thread, stitch damage, tension, or seam construction | Review thread specification, needle, density, and reinforcement |
| Tape frays at stitch line | Tape quality, narrow bite, needle damage | Increase usable tape width or revise sewing setup |
| Bag fabric tears beside seam | Fabric/coating strength or insufficient load distribution | Add backing, change seam location, or improve fabric specification |
| Zipper waves and jams | Differential feeding or pattern curve mismatch | Adjust sewing method, notches, radius, and tension |
| Lining catches in slider | Insufficient clearance or unsecured seam allowance | Add guard, topstitch, bind, or reposition lining |
Why Zippers Split Behind the Slider
When a closed zipper separates behind the slider, the slider may no longer press the two sides into correct engagement. Wear, body deformation, an incompatible slider, contamination, misaligned chain, damaged elements, or excessive lateral load can contribute. Repeatedly squeezing the slider with pliers is not a controlled production solution; it can crack or distort the component and mask the root cause.
A second cause is user load. An overfilled compartment pushes the two stringers apart while the slider is closing. If the opening geometry concentrates force at a corner, splitting becomes more likely. Compare the failure on an empty bag and a defined loaded bag, then inspect both the zipper and surrounding panel.
Water-Resistant Zippers: Define the Claim Carefully
Reverse-coil zippers with coated tape can reduce water entry through the zipper area. They are often described as water-resistant or water-repellent. That does not automatically make the finished backpack waterproof.
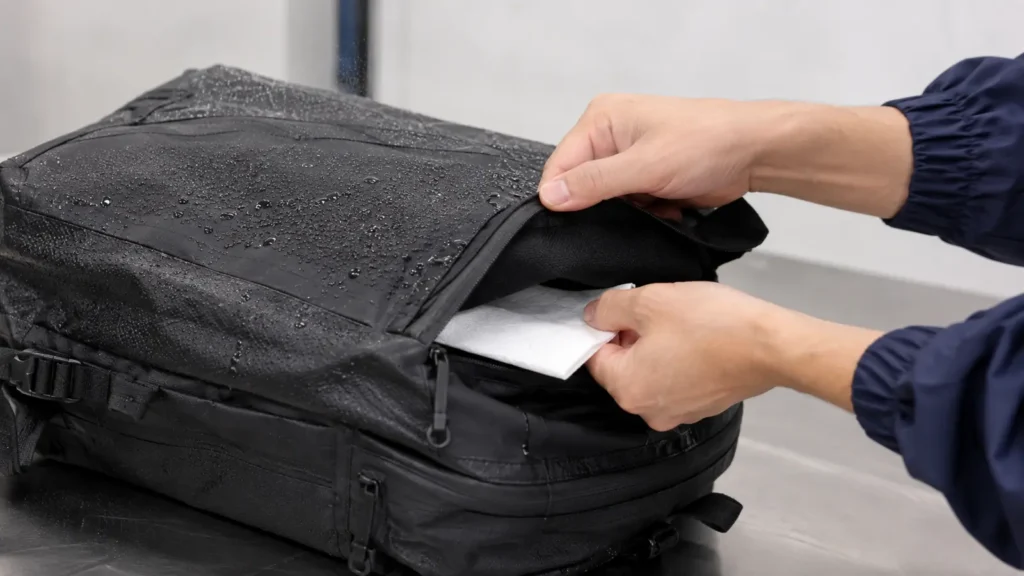
Water can enter through the slider gap, ends, stitch holes, nearby seams, puller garage, fabric, or unsealed panel joints. Performance can also change when the coating is folded sharply, abraded, contaminated, or repeatedly operated.
If water protection matters, define the complete product claim and test method. A light spray check, rain test, hydrostatic pressure method, and immersion test represent very different exposures. Do not market an ordinary coated zipper as suitable for submersion unless the complete bag construction has been designed and verified for that condition.
Custom Pull Tabs and Pullers
Custom pullers can improve grip and brand recognition, but they change the mechanical system. A long or heavy metal puller increases leverage and may strike the bag during movement. A thick molded puller can interfere with a zipper garage. A cord loop can fray, untie, or become a snag point. Sharp casting edges can damage fabric or users.
Approve the custom puller for:
- grip with bare hands and, when relevant, gloves;
- pull direction around straight and curved paths;
- pull-off and twist resistance;
- repeated impact against the bag;
- surface finish, corrosion, and color consistency;
- clearance from piping, flaps, buckles, and other sliders;
- attachment security after cycle testing;
- child-use considerations where applicable.
The decorative part and its connection to the slider should both be tested. A robust rubber tab is ineffective if attached by a weak cord or thin connector.
Planning a custom backpack? Send JIUMU your bag dimensions, expected load, opening shape, zipper preference, quantity, logo files, packaging needs, and target delivery date. We can review the construction for sampling and provide a project-specific quotation through Contact Us.
Sample Approval Workflow
Step 1: Approve the Written Specification
Confirm the zipper type, nominal size, material, tape and element colors, slider configuration, puller, stops, opening length, sewing method, and applicable tests. Mark the tech-pack version and date.
Step 2: Review the Development Sample
Inspect every zipper on the finished sample. Operate them empty and under a representative load. Check straight paths, corners, garages, lining clearance, and access while worn. Photograph any defect with a location marker.
Step 3: Conduct Risk-Based Tests
Select component and finished-bag tests appropriate to the use. High-risk main openings deserve more attention than a small decorative pocket. Testing should use the agreed method and record conditioning, equipment, sample count, results, and failure modes.
Step 4: Correct and Resample
Do not approve vague promises to “make the zipper smoother in bulk.” Update the pattern, materials, zipper, sewing method, or puller specification; issue a new version; and verify the revised physical sample.
Step 5: Establish the Golden Sample
Once approved, label and retain the physical sample with its version, date, order reference, bill of materials, and approved exceptions. Buyer and supplier should use equivalent controlled references when practical.
Bulk-Production Inspection Method
Bulk inspection cannot destructively test every backpack. Use a combination of incoming component control, in-line process checks, functional inspection, and selected destructive or laboratory tests.
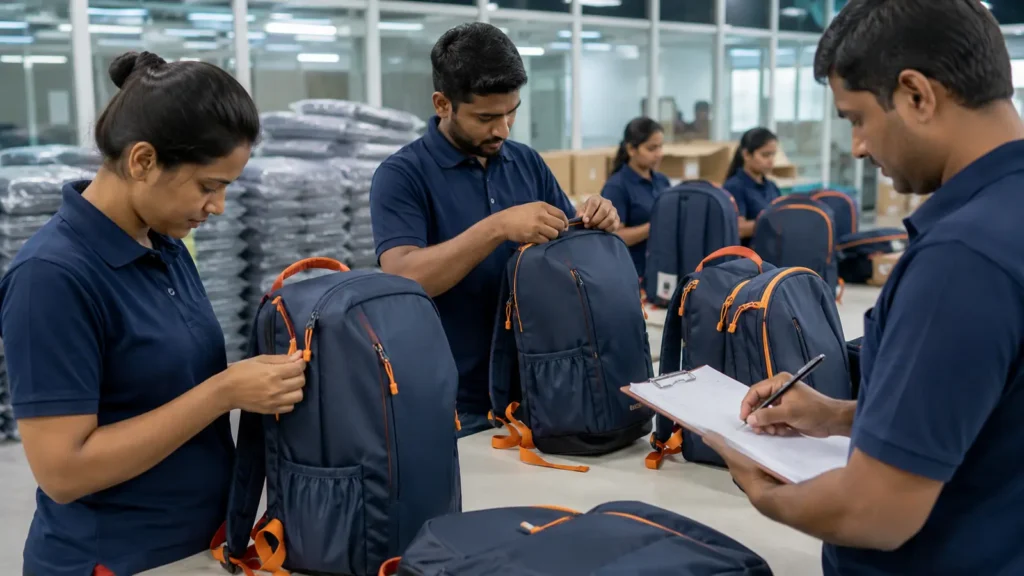
Incoming and In-Line Controls
- Verify zipper supplier reference, type, size, color, length, slider, puller, and stops against the approved BOM.
- Segregate lots and record lot or batch information when available.
- Check cutting and end preparation before assembly.
- Inspect zipper alignment, seam allowance, stitching, curve formation, and lining clearance during sewing.
- Escalate recurring resistance or waviness instead of waiting for final inspection.
Final Functional Inspection
Define the sampling plan before production. For each selected backpack, fully open and close every zipper more than once, observe the entire travel, check stops and pullers, and compare construction with the approved sample. Include different carton positions and production times rather than choosing only easy-to-reach top units.
Destructive or Laboratory Verification
Where the contract requires strength or endurance testing, reserve specimens or finished bags from the production lot. State whether testing is performed by the factory, buyer, or qualified third-party laboratory. Record the method and acceptance value in the purchase agreement. A generic “test passed” statement without method, result, and specimen identification is weak evidence.
Copyable Zipper Durability Test Specification
| Field | Buyer-approved entry |
|---|---|
| Project / SKU | |
| Tech-pack version and date | |
| Backpack use and target user | |
| Representative working load | |
| Zipper location | |
| Zipper type and nominal size | |
| Tape, element, slider, puller and stop specification | |
| Installed opening length and curve | |
| Conditioning | |
| Reciprocating test method and cycles | |
| Chain / element strength method and limit | |
| Slider, puller and stop tests | |
| Zipper-seam strength method and limit | |
| Loaded-bag operation procedure | |
| Water-resistance method, if required | |
| Sample quantity and sampling plan | |
| Failure definitions | |
| Corrective action and retest rule | |
| Buyer / supplier approval |
Sample Test Record
For every test, record the sample ID, zipper location, component lot, preconditioning, method, equipment ID, test date, operator, result, failure mode, photographs, disposition, corrective action, and retest result. This record is more useful for repeat orders than a photograph of an old backpack because it preserves the actual construction and acceptance logic.
Bulk Zipper Inspection Checklist
- Correct zipper type, size, length, color, slider, puller, and stops
- No missing, damaged, sharp, or contaminated elements
- Tape lies flat without excessive waves
- Sewing is secure, even, and clear of the slider path
- Lining and seam allowance cannot easily enter the slider
- Zipper travels through straight sections and corners without abnormal force
- Chain remains closed behind the slider
- Puller and stops remain secure
- Loaded compartment closes without forced distortion
- Coated zipper and surrounding construction match the approved water-protection specification
- Defects are identified by SKU, size/color, carton, and production lot
- Failed units are segregated and corrective action is documented
Failure and Corrective Action Record
When a zipper fails, classify it rather than writing only “zipper problem.” Identify whether the defect involves the chain, slider, puller, stop, tape, seam, lining, pattern curve, contamination, or loading. Record the affected quantity and lot, contain suspect products, determine the likely cause, approve the corrective action, and retest representative units. If the BOM or construction changes, update the tech pack and Golden Sample.
Questions to Ask a Backpack Supplier
- What exact zipper construction and supplier reference will be used?
- Is the proposed zipper suitable for the opening radius and expected load?
- Which zipper component and operability tests can be performed or arranged?
- How will cycle count, load, travel, and failure criteria be documented?
- How is zipper tape secured to the backpack fabric at high-stress points?
- Can the finished bag be tested while loaded around corners?
- What does any “waterproof” or “water-resistant” claim specifically cover?
- How will a custom puller be tested for pull-off, twist, impact, and interference?
- What incoming, in-line, and final zipper checks are included?
- What happens if a sample or bulk test fails?
Buyers can review broader inspection planning in JIUMU’s Quality Control guidance, compare textile considerations in Backpack Materials, explore Custom Team Bags, and review available development processes under Manufacturing Capabilities.
Common Procurement Mistakes
Selecting by zipper size alone. Nominal size is only one variable. Demand the complete construction and validate it in the bag.
Testing only an empty sample. Loading changes panel tension, curve geometry, and user force.
Ignoring small pockets. A small pocket can still fail if lining catches or the opening is too tight.
Approving a custom puller visually. Appearance does not demonstrate attachment strength or clearance.
Treating coated tape as a waterproof bag. The full seam and panel system controls water entry.
Using an undefined cycle claim. A cycle number without test conditions cannot be meaningfully compared.
Accepting verbal corrections. Every change should update the version-controlled specification and physical sample.
How JIUMU Supports Custom Backpack Development
JIUMU provides OEM and ODM development for custom bags and branded merchandise, including material sourcing, logo application, labels, packaging, digital mockups, physical samples, bulk production, and quality-control support. For zipper-critical projects, the practical starting point is a complete use brief: bag dimensions, compartments, representative load, zipper paths, preferred appearance, puller requirements, logo files, quantity, packaging, and delivery target.
The development sample can then be used to confirm the actual combination of zipper, fabric, pattern geometry, lining, foam, piping, sewing, and user access. Any special laboratory requirement should be disclosed before quotation so method, sample quantity, cost, and lead time can be planned.
Frequently Asked Questions
Final Recommendation
Treat zipper durability as a product-system decision, not a component label. Specify the intended use, verify each critical zipper part, test repeated operation and strength with a defined method, operate the finished bag under a representative load, inspect the zipper seam, and retain an approved Golden Sample with complete records. This process gives buyers and suppliers a shared standard and makes failures easier to diagnose before they reach customers.
For a custom backpack quotation, send JIUMU your reference images or tech pack, dimensions, compartments, expected load, zipper routes, material preferences, logo files, quantity, packaging requirements, test protocol, and target delivery date. Contact JIUMU to review the project and plan sampling.
Technical References
- ASTM D2061-07(2021), Standard Test Methods for Strength Tests for Zippers
- ASTM D2060-14(2022), Standard Test Methods for Measuring Zipper Dimensions
- YKK Digital Showroom: fastening and water-protective zipper product information
About JIUMU
JIUMU is a Guangdong-based B2B supplier of custom teamwear, hats, bags and branded merchandise, established in 2010. This guide is intended for procurement planning; project specifications and test requirements should be confirmed before production.