How to Create a Tech Pack for a Custom Backpack
A custom backpack can begin as a pencil sketch, a mood board, a reference photo, or an existing sample. None of those inputs is automatically a production specification. A factory still needs to know what the bag looks like from every side, how large it is, what fits inside it, which materials and components to use, where each logo goes, how the sample will be tested, and who has authority to approve changes.
A backpack tech pack organizes those decisions into one controlled document set. It helps brands, schools, promotional-product buyers, teams, and distributors obtain comparable quotations, reduce sample revisions, inspect prototypes, and preserve a usable standard for bulk production and repeat orders.
A useful tech pack connects the design concept to measurements, materials, components, testing, approval, and revision control.
Quick Answer
A custom backpack tech pack should include a cover page and version number; front, back, side, bottom, and interior drawings; finished dimensions and points of measurement; intended capacity and capacity method; compartment specifications; a material and trim bill of materials; zipper, buckle, webbing, shoulder-strap, handle, back-panel, and padding details; logo, Pantone target, label, and packaging instructions; performance or compliance requirements; project-specific tolerances; and a prototype approval record. A factory can help complete missing fields, but every assumption should be documented and approved before bulk production.
What Is a Backpack Tech Pack?
A tech pack is the controlled technical description of a product. It translates appearance and use into information that design, sourcing, costing, pattern, sample, production, quality, and logistics teams can use consistently.
For a backpack, the tech pack is usually not one crowded page. It is a set of linked files or sheets:
| Tech pack section | Main purpose | Typical owner |
|---|---|---|
| Cover and revision log | Identifies project, style, version, date, and approval state | Buyer or product manager |
| Technical drawings | Defines visible shape, panels, openings, seams, pockets, and interior | Designer with factory review |
| Measurement specification | Defines finished dimensions and how each point is measured | Buyer and pattern technician |
| Material BOM | Defines shell, lining, mesh, coatings, foam, reinforcement, and color | Sourcing and product development |
| Trim schedule | Defines zippers, sliders, buckles, webbing, binding, cord, and hardware | Designer, sourcing, and factory |
| Construction notes | Defines seams, reinforcement, attachment, binding, and assembly priorities | Factory technical team with buyer approval |
| Artwork and branding | Defines logos, labels, Pantone targets, dimensions, and placement | Brand owner |
| Packaging | Defines folding, stuffing, bagging, tags, labels, cartons, and assortment | Buyer and logistics team |
| Testing and tolerance | Defines expected performance, method, conditioning, samples, and pass criteria | Buyer, lab, and supplier |
| Prototype comments | Records actual sample findings, corrections, and approval | Authorized approver |
The tech pack should be detailed enough to prevent silent assumptions but organized enough that teams can find the current requirement quickly.
Start With a Controlled Cover Page and Revision Log
Every page should identify the same style and revision. A professional cover page normally records:
- brand or buyer;
- project and style name;
- unique style or SKU code;
- product category and intended use;
- target user or age group;
- target market;
- creator and authorized approver;
- original issue date;
- current revision number and date;
- sample stage;
- confidentiality or ownership note when applicable;
- linked artwork, roster, packaging, and test files.
Use a revision table with four fields: revision, date, change, and owner. “V3” is not useful if nobody knows what changed between V2 and V3. For example: “V3 — front pocket width increased; laptop sleeve moved 15 mm upward; zipper pull changed from cord to molded pull.”
Do not overwrite old approvals silently. Archive superseded versions, mark them obsolete, and keep only one active production folder. Email attachments should not become competing masters.
Draw the Front, Back, Sides, Bottom, and Interior
Flat technical drawings communicate structure more reliably than a perspective rendering. Include enough views to show every component and hidden feature.
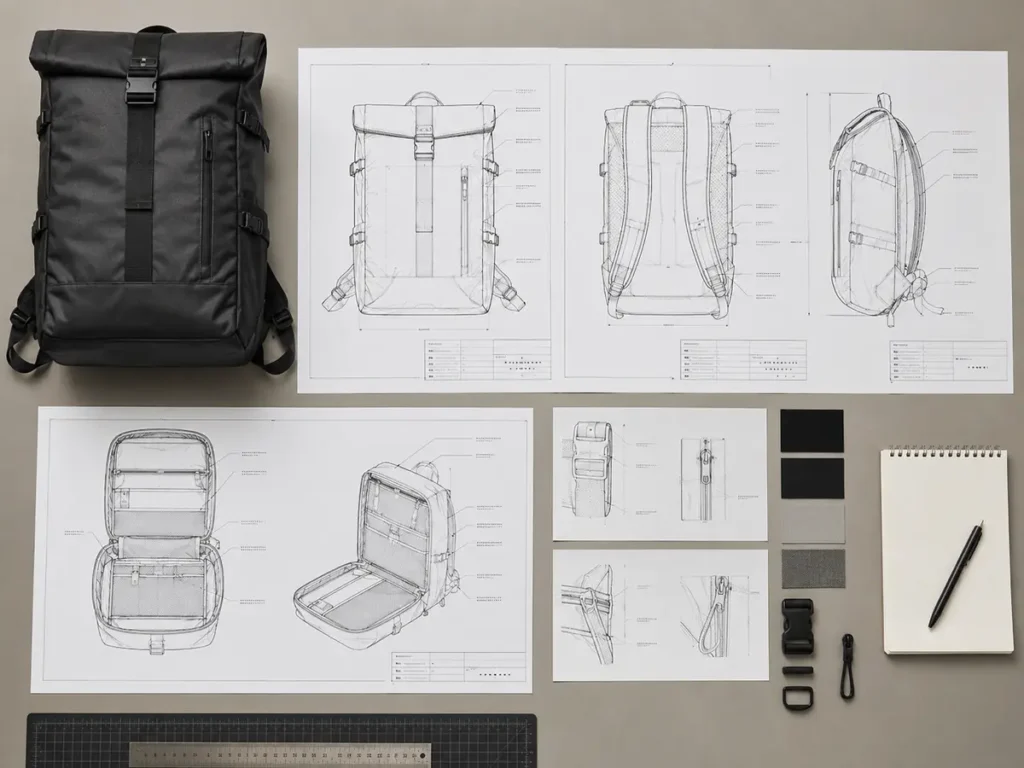
Use consistent callout numbers across drawings, the measurement chart, BOM, and prototype comments.
Exterior views
At minimum, show:
- front view;
- back view with straps and back panel;
- left and right side views if they differ;
- top and bottom views when construction is not obvious;
- open view of each main zipper compartment;
- detail views for pockets, gussets, handle, strap ends, and hardware.
Mark seams, topstitching, binding, piping, panel joins, zipper openings, pleats, darts, elastic, compression straps, and reinforcement zones. Use callout IDs such as M01 for material, T01 for trim, L01 for label, and P01 for point of measurement.
Interior views
Show the main compartment open and identify:
- laptop and tablet sleeves;
- document dividers;
- organizer pockets;
- mesh or zip pockets;
- key clip or accessory loops;
- lining seams and binding;
- foam or reinforcement hidden between layers;
- hydration, cable, or luggage-pass-through features when applicable;
- pocket opening direction;
- finished pocket height and width.
A note that says “inside pocket” is insufficient. The factory needs its location, finished size, opening, closure, material, edge finish, and attachment method.
Can a Factory Use a Reference Photo?
Yes, but a reference photo should be treated as design evidence, not a complete instruction. It may show silhouette, styling, color direction, or pocket arrangement. It usually cannot confirm:
- exact finished dimensions;
- hidden reinforcement and foam;
- fabric composition, weight, or coating;
- zipper type or chain size;
- pocket depth and internal organization;
- seam allowance and construction sequence;
- strap curvature and padding thickness;
- load expectations;
- color under controlled lighting;
- ownership or permission to reproduce protected features.
Label what you want to copy from each reference. For example, “use the general top-opening shape” is clearer than “make this bag.” Identify what must be original and confirm that supplied logos, artwork, and third-party product features can be used legally.
Developing from an existing sample
An existing backpack allows the supplier to measure finished dimensions and examine construction, but it still needs an instruction sheet. Mark:
- Keep: features to retain;
- Modify: features that change;
- Remove: unwanted features;
- Unknown: details the factory should investigate and submit for approval.
Photograph the sample from square angles, assign it a reference ID, and state whether destructive opening is permitted. A factory should not cut apart the only valuable sample without written authorization.
Define Finished Dimensions With Points of Measurement
A single line reading “45 × 30 × 15 cm” leaves room for different interpretations. Does depth include a stuffed front pocket? Is width measured at the top, middle, or widest point? Is height measured from the bottom seam to the top seam or to the top of the handle?
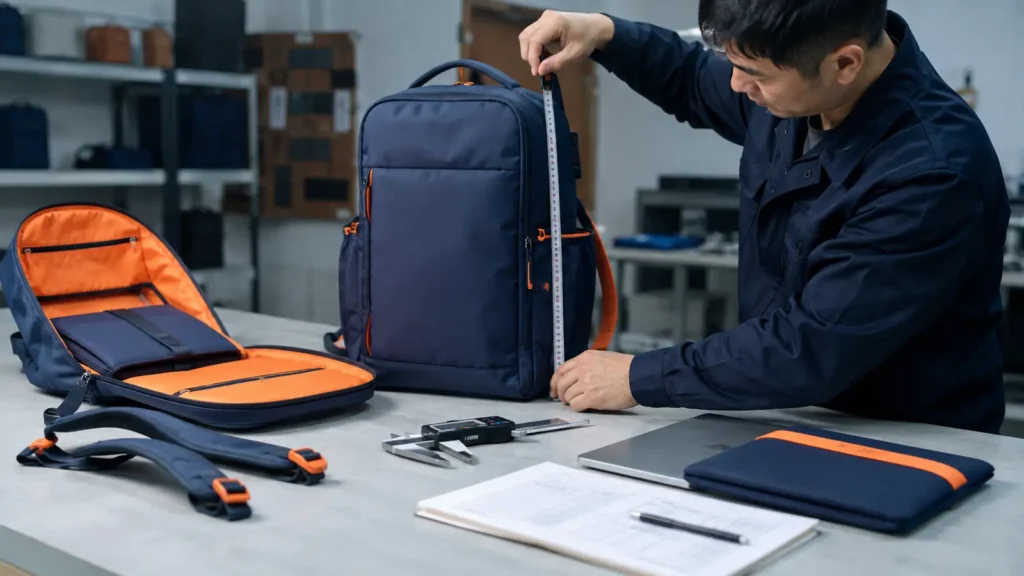
Each dimension needs a named reference, product condition, direction, unit, target, and allowed tolerance.
Build a Point of Measurement chart
| POM | Measurement | Method definition |
|---|---|---|
| P01 | Finished body height | Bottom finished seam to highest body seam, excluding handle |
| P02 | Body width | Side seam to side seam at the stated reference height |
| P03 | Body depth | Back panel to front body at the stated level and fill condition |
| P04 | Main zipper opening | Usable opening length between stops along the zipper curve |
| P05 | Front pocket width | Finished pocket boundary at the named height |
| P06 | Laptop sleeve height | Inside bottom to finished sleeve edge |
| P07 | Laptop sleeve width | Inside usable width without stretching |
| P08 | Shoulder strap length | Named start to end points at a defined adjustment position |
| P09 | Shoulder strap width | Finished width at a named location |
| P10 | Handle drop | Top body reference to inside top of handle |
These definitions are examples. Adapt them to the actual pattern and intended measurement practice.
State the measurement condition
Measurements change when a soft bag is empty, flattened, naturally filled, or fully extended. Record whether the sample is:
- empty and relaxed;
- laid flat without stretching;
- filled with a defined form or contents;
- zipped closed;
- measured after conditioning;
- measured externally or internally.
Use one unit system as the primary standard and show any conversion carefully. Avoid rounding back and forth between inches and millimeters during revisions.
Specify Capacity and Compartments Separately
External height × width × depth is not a reliable capacity claim for a shaped, padded, multi-pocket backpack. Curves, tapered panels, internal sleeves, foam, seams, and inaccessible spaces affect usable volume.
ASTM F2153 provides a standardized test method for unextended and extended backpack capacity so manufacturers and buyers can compare volume consistently. Its stated scope excludes areas that are not completely enclosed by fabric, including open mesh and bottle pockets, and says the method is not practical below 4 L. If capacity is a commercial claim, state the intended method rather than relying only on CAD volume or multiplication.
How should compartments be measured?
For every compartment, identify:
- internal or external measurement;
- usable width, height, and depth;
- opening width and opening direction;
- closure type;
- target item or use;
- padding that reduces space;
- whether the pocket is gusseted, flat, elastic, or shared with another volume;
- whether the dimension is measured empty or with a form.
For a laptop sleeve, do not specify only “fits 15-inch laptop.” Device screen size does not define chassis dimensions. Provide the maximum device width, height, and thickness, required access clearance, and desired padding.
Build a Complete Material BOM
The bill of materials should identify every material by location. “600D polyester” alone does not fully define appearance or performance.
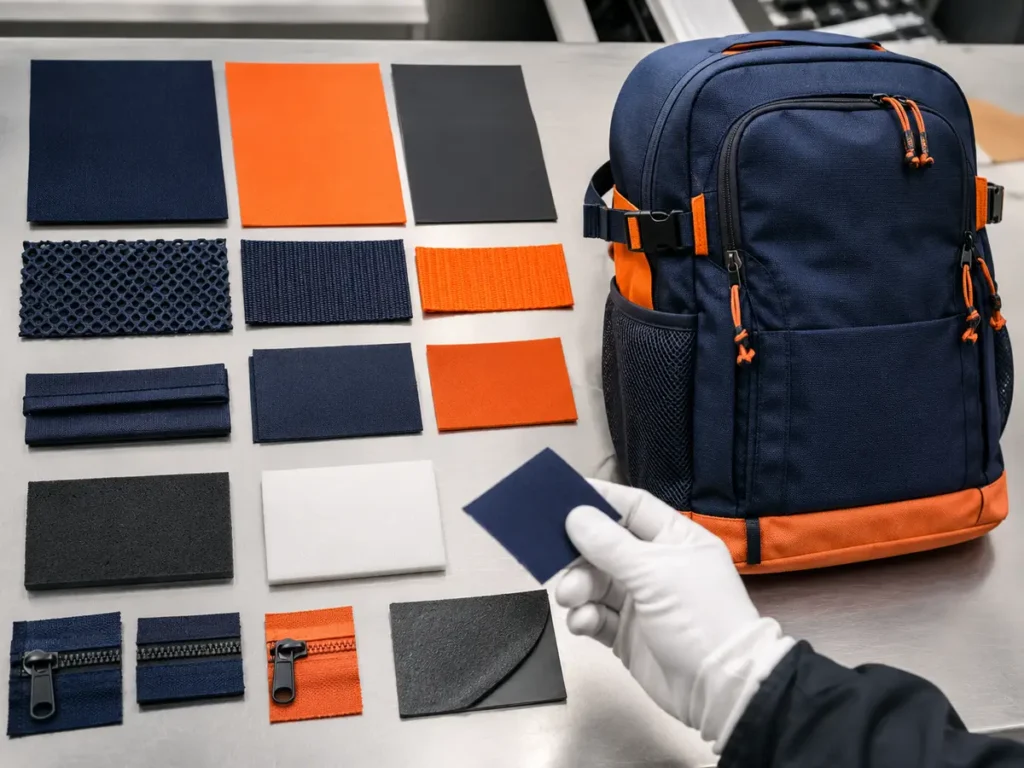
A usable BOM links each material to a location, construction, color, physical reference, and approved supplier code.
Main fabric and lining
Record, where relevant:
- material ID and exact location;
- fiber composition;
- yarn or fabric construction;
- denier or yarn specification;
- fabric mass in g/m² when required;
- weave or knit structure;
- coating or laminate type and side;
- surface finish and hand feel;
- color target and supplier color code;
- approved swatch ID;
- functional performance requirement;
- restricted-substance or market-compliance requirement;
- substitution rule.
Denier and grams per square meter describe different properties. Denier relates to yarn linear density; g/m² describes fabric mass per area. One should not be used as a guaranteed conversion for the other.
The lining needs its own specification. Record color, weight, coating, weave, print, and location. Light-colored linings may improve visibility inside the bag; dark linings may hide marks. This is a design choice, not a universal quality ranking.
Mesh, binding, and reinforcement
Specify mesh type, stretch direction, hole appearance, edge finish, and recovery expectation. Identify binding width before and after folding. Reinforcement may include additional fabric, nonwoven support, board, foam, tape, or bar-tack locations; show its exact footprint or pattern reference.
Coating and water claims
Do not write “waterproof” without a defined construction and test. A coated fabric does not automatically make the complete bag waterproof because seams, needle holes, zippers, openings, and design features affect the finished result. State the intended exposure, relevant material or product test, sample condition, and pass criterion.
Specify Zippers, Buckles, Webbing, Straps, and Handles
Trim ambiguity frequently causes price and appearance differences. A trim schedule should connect each component to the drawing callout.
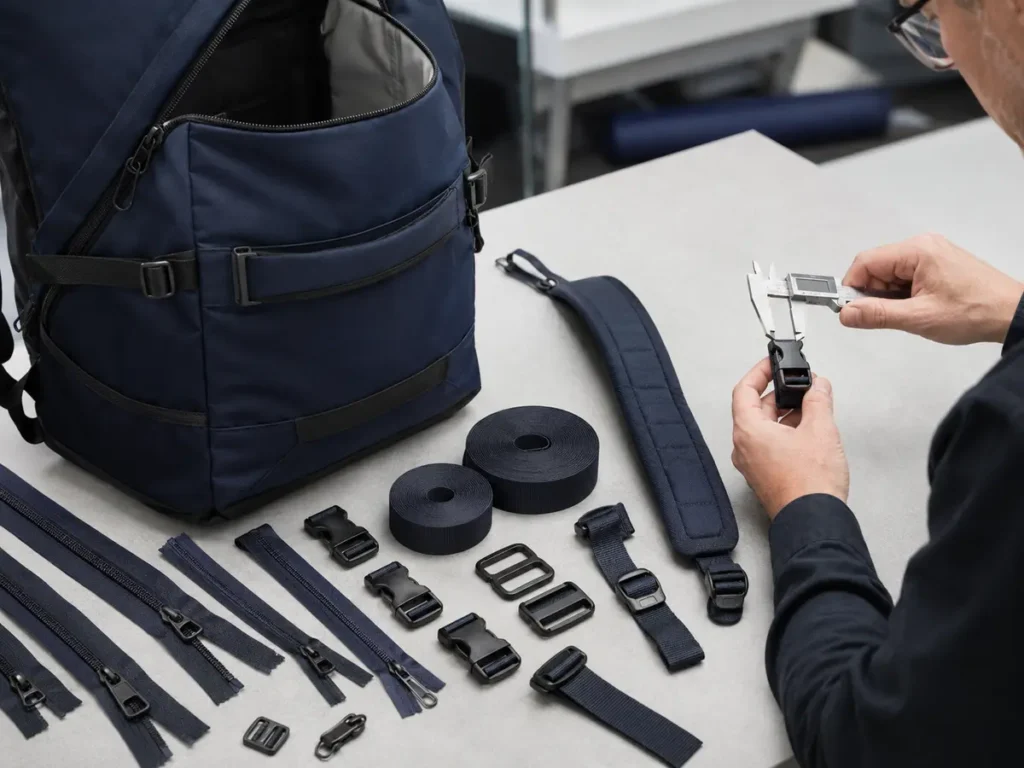
Define function, dimensions, material, color, finish, supplier code, and attachment—not only the generic component name.
Zippers
YKK’s product references illustrate important distinctions among zipper constructions. Standard coil zippers use spiral plastic elements; VISLON-style molded zippers use injection-molded plastic elements; metal zippers use metal elements. A tech pack should avoid writing only “nylon zipper.”
Specify:
- coil, molded plastic, or metal element type;
- chain size or approved supplier code;
- closed-end, open-end, one-way, or two-way configuration;
- zipper tape material and color;
- slider type and quantity;
- lock or non-lock behavior where relevant;
- puller shape, material, color, and logo;
- finished opening length;
- reverse-coil or conventional orientation;
- covered, exposed, or water-resistant construction when tested and approved;
- reinforcement and end-stop details.
Buckles and adjusters
Record component type, inside width for the webbing, material, finish, color, supplier reference, direction of use, and mating parts. A 25 mm buckle must correspond to the actual webbing and construction; nominal sizes alone do not prove compatibility.
Webbing and binding
State fiber, finished width, thickness when important, weave, edge, color, hand feel, stretch, and location. Identify whether webbing is load-bearing, decorative, or only used as a pull tab.
Shoulder straps and carry handles
Show strap shape as a pattern or full-size outline. Specify finished width, length range, curvature, outer fabric, underside mesh, foam type and thickness, binding, adjuster, attachment area, reinforcement, and topstitching. For the handle, define finished length, handle drop, folded layers, padding, wrap, and attachment.
Detail the Laptop Sleeve, Back Panel, and Padding
Padding specifications should describe the system, not only one foam thickness.
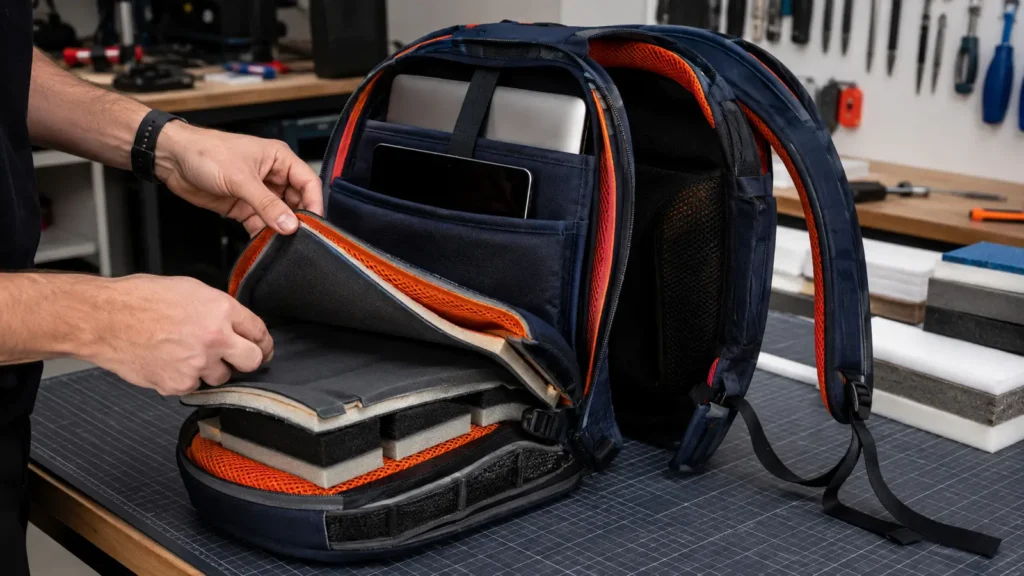
The protective result depends on geometry, material, thickness, coverage, seams, and bottom clearance.
Laptop compartment
Define:
- maximum device envelope;
- sleeve location and access;
- lining and facing fabric;
- foam type, nominal thickness, density or firmness reference when required;
- foam coverage map;
- bottom suspension distance or bumper construction;
- closure and retention;
- seam and binding details;
- whether the sleeve shares space with documents or hydration components.
A thick foam number does not automatically mean better protection. Gaps, compressed seams, inadequate bottom clearance, and a loose device fit can reduce the benefit.
Back panel
Show foam zones, ventilation channels, spacer mesh, curvature, lumbar features, luggage sleeve, and contact area. State whether panels are cosmetic, structural, or intended to manage comfort. Any performance claim should match a defined test or approved evaluation.
Bottom and side protection
Identify whether the bag uses double fabric, foam, coated reinforcement, board, molded parts, feet, or an external protective panel. Mark coverage and attachment precisely.
Define Logo, Pantone, Labels, and Packaging
Branding requirements should be production-specific. Provide vector artwork and a placement drawing for every logo.
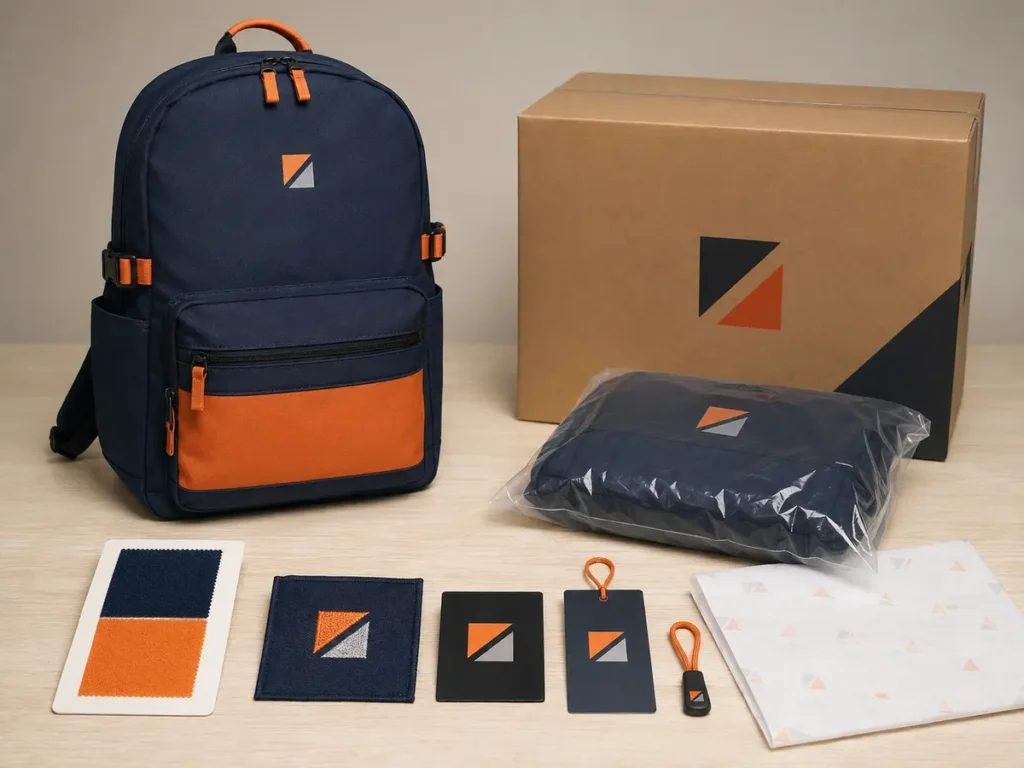
Logo schedule
Record:
- artwork filename and revision;
- decoration method;
- finished width and height;
- location and measurement reference;
- color target and approved thread, ink, patch, or film code;
- background material and color;
- stitch or edge requirements;
- minimum-detail limitations;
- sample or strike-off approval ID.
Embroidery, screen print, heat transfer, woven patches, rubber/PVC patches, and leather-style patches reproduce detail differently. Create approved variants rather than forcing one complex file onto every process.
Pantone provides a common color language, but final appearance still depends on material, finish, lighting, and process. Use a current physical reference and approve the actual fabric, thread, print, and component result. Do not rely on a screen simulation alone.
Labels and legal information
Show placement, dimensions, fold type, material, ground color, artwork, sewing method, and information source for woven labels, printed labels, care labels, country-of-origin labels, size labels, school IDs, and tracking labels. The buyer should confirm current legal and marketplace requirements for each destination.
Packaging
Define:
- stuffing or shape support;
- strap arrangement;
- folding or no-fold condition;
- tissue or protective layer;
- individual bag type and closure;
- suffocation or material markings where required;
- hangtag and barcode placement;
- SKU, color, and carton-assortment logic;
- outer carton dimensions, strength requirement, marks, and quantity;
- moisture-control requirement;
- retailer, marketplace, or warehouse labels.
ISTA explains that packaging tests should reflect distribution hazards such as shock, drop, vibration, compression, and atmospheric conditions. Select a procedure based on the actual packaged product and route rather than adding a generic “drop test” line with no method or pass criteria.
Add Testing Requirements and Project-Specific Tolerances
A tech pack should state what must be verified, how, on how many samples, under what conditions, and what result counts as a pass. A test name without a method revision and acceptance rule creates disputes.
Possible backpack test categories include:
| Test area | What the buyer should define |
|---|---|
| Finished measurements | POM, target, tolerance, sample condition, measuring tool |
| Capacity | Method, enclosed areas, extended/unextended condition, claim rounding |
| Static or dynamic loading | Load, distribution, duration/cycles, attachment points, failure definition |
| Handle and strap attachment | Fixture, direction, load/cycles, acceptable deformation |
| Zipper operation | Zipper configuration, cycles, load, failure or snag criterion |
| Seam performance | Seam type, material combination, direction, strength or appearance limit |
| Fabric performance | Abrasion, tear, tensile, colorfastness, coating, or water method as relevant |
| Hardware | Function, corrosion or finish requirement, compatibility with webbing |
| Chemical/compliance | Market, regulation, restricted substances, age group, report requirement |
| Packaged product | Distribution route, conditioning, drop/vibration/compression procedure, damage limit |
Do not invent one universal tolerance for every backpack. A dimension controlled by a molded insert behaves differently from a soft pocket. Set tolerances by POM, material, construction, functional risk, sample capability, and agreed inspection practice.
The measurement table should contain nominal target, plus/minus tolerance, criticality, and disposition. For aesthetic items, include an approved visual sample or boundary photograph.
Need help turning a backpack idea into a factory-ready specification?
Send JIUMU your sketch, reference photos or sample, target dimensions, intended contents, quantity, logo files, colors, packaging, destination, and delivery target. We can review missing technical decisions and organize the prototype brief before quotation. Discuss Your Custom Backpack Project.
Can a Factory Complete an Incomplete Tech Pack?
Yes. A capable supplier can recommend materials, components, construction, and manufacturing details. However, “the factory will decide” should become a documented assumption-and-approval process.
Use three status labels:
- Buyer Fixed: must not change without written approval.
- Supplier Proposal Required: factory supplies options, cost impact, MOQ, lead-time effect, and sample evidence.
- Prototype Validation: the team expects the sample to determine the final decision.
Create an open-issues log with question, owner, proposed answer, evidence, deadline, decision, and revision. If a supplier fills missing data, the returned tech pack should show those additions clearly. The buyer should never discover the assumed material or component only after bulk production.
Prototype Review and Approval Workflow
The sample is where drawings and materials become a three-dimensional product. It should update the tech pack—not replace it.
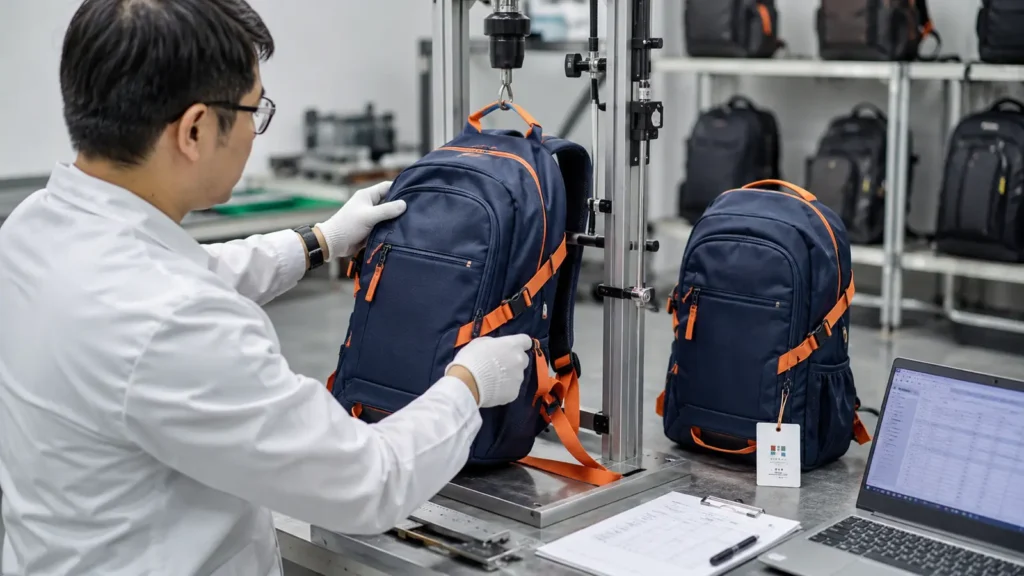
Approve the physical sample and the revised written specification together.
Recommended sequence
- Buyer issues a dated tech pack and source files.
- Factory completes feasibility review and open questions.
- Buyer approves material and component proposals.
- Factory confirms quotation assumptions and sample scope.
- Prototype is made under a unique sample ID.
- Buyer checks dimensions, construction, function, appearance, branding, and packaging.
- Comments identify current condition, required correction, reference, owner, and affected file.
- Factory returns a revised pack and new sample or evidence.
- Buyer records Approved, Approved With Documented Correction, or Revise and Resample.
- Final sample and specification become the Golden Sample standard.
Use the existing Backpack Prototype Approval guidance to connect sample approval with bulk production control.
Write measurable sample comments
Avoid comments such as “make the strap better” or “pocket too small.” A useful comment states:
- sample and revision ID;
- affected component or POM;
- measured or observed result;
- required target;
- correction method if fixed by buyer;
- supplier proposal if method is open;
- affected sizes, colors, or variants;
- evidence required for closure;
- whether resampling is mandatory.
Take square photographs with a ruler or scale when relevant. Photograph hidden details before closing the sample if the supplier provides construction evidence.
What Should You Send for a Quote?
Send the current tech pack even if incomplete, plus:
- intended use and target user;
- target quantity by color and version;
- target dimensions and contents;
- reference images or physical sample availability;
- must-have versus optional features;
- logo vector files and physical color target;
- required labels and packaging;
- destination market and compliance expectations;
- test requirements or retailer manual;
- target cost when it will affect material selection;
- delivery destination and required arrival date;
- required sample stages.
Ask the supplier to return a quote with stated assumptions, proposed materials, component codes, MOQ, tooling, sample cost, production scope, packaging, and exclusions. Two prices are comparable only when they describe the same product.
Questions to Ask the Supplier
- Which fields are insufficient for costing or pattern development?
- Which materials are stock, custom, or subject to separate minimums?
- Will proposed substitutes be submitted before use?
- How will capacity and compartments be measured?
- Which components require tooling or custom color?
- What prototype stages are recommended?
- Which tests can be performed in-house, and which require an external lab?
- How are test methods and pass criteria recorded?
- What constitutes the production Golden Sample?
- How are revisions linked to purchase orders and repeat orders?
Review JIUMU’s Manufacturing Capabilities and Custom Team Bags before sending the brief.
Common Tech Pack Mistakes
| Mistake | Production risk | Better control |
|---|---|---|
| Only a perspective sketch | Hidden panels and interior are guessed | Add orthographic and open-interior views |
| Dimensions without methods | Buyer and QC measure differently | Assign POM IDs and exact reference points |
| Capacity from exterior multiplication | Volume claim is inconsistent | State a recognized or agreed capacity method |
| “600D fabric” only | Weight, weave, coating, hand, and color vary | Complete a material BOM and approve swatches |
| “High-quality zipper” | No chain, slider, puller, or supplier code | Complete a trim schedule |
| One logo file for all methods | Embroidery or patches lose detail | Use production-specific artwork variants |
| “Waterproof” without a test | Coated fabric is mistaken for finished-bag performance | Define exposure, method, condition, and pass rule |
| One tolerance for every dimension | Soft and structural features are treated alike | Set tolerance by POM and risk |
| Comments in separate chats | Revision history becomes contradictory | Use one sample comment sheet and current pack |
| Sample approved without updated files | Bulk follows obsolete instructions | Seal sample and specification together |
Why JIUMU Is Relevant
JIUMU supports OEM and ODM development for custom teamwear, bags, hats, uniforms, and branded merchandise. Its approved capability profile includes fabric sourcing, Pantone color matching, embroidery, printing, patches, labels, hangtags, customized packaging, digital mockups, physical samples, quality control, and export support.
For a backpack project, those capabilities can connect the tech pack to material proposals, decoration samples, prototype development, packaging, and production review. Each project still requires a confirmed specification, sample plan, quotation, and approved standard.
Frequently Asked Questions
Final Recommendation
Treat a backpack tech pack as a controlled decision system, not an artistic presentation. Show every exterior and interior view, define how measurements and capacity are taken, connect materials and trims to callouts, specify hidden padding and reinforcement, provide production-ready branding, and make tests and tolerances measurable.
When information is incomplete, allow the supplier to propose solutions—but never allow an undocumented assumption to become the production standard. Approve the revised written pack and physical Golden Sample together.
Start a custom backpack development project with clear inputs
Share your sketch, reference images or sample, target size and capacity, compartment needs, quantity, logo, colors, packaging, testing expectations, destination, and required arrival date with JIUMU. Send Your Backpack Development Brief.
Sources and Further Reading
- ASTM F2153: Standard Test Method for Measurement of Backpack Capacity
- ASTM Subcommittee F08.22: Camping Softgoods Standards
- YKK Fastening Products
- YKK Standard Coil Zipper
- YKK VISLON Molded Zipper
- ISTA Test Procedures
- ISTA: Getting Started With Package Design and Testing
- Pantone Color Systems Explained
About JIUMU
JIUMU supports brands, schools, distributors, teams, and promotional buyers with OEM/ODM bags, material sourcing, decoration, physical samples, packaging, quality control, and export support.