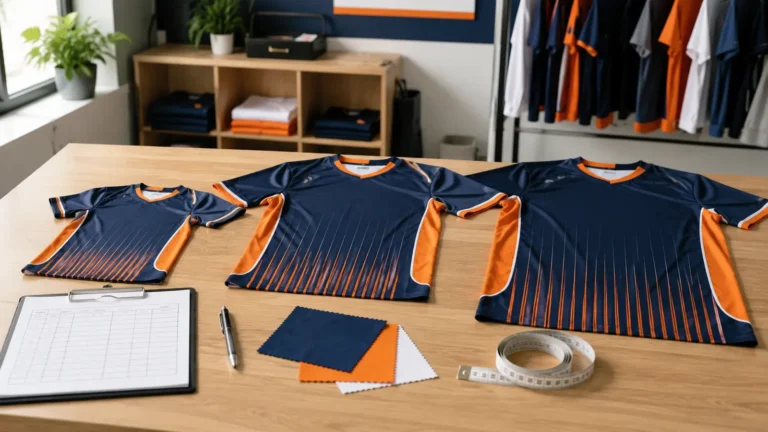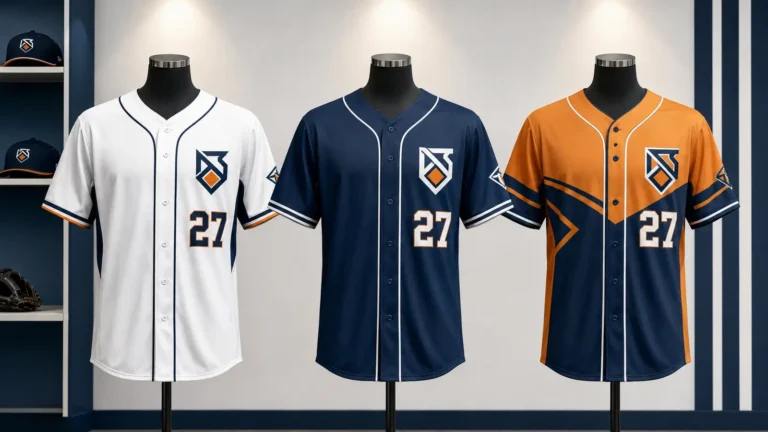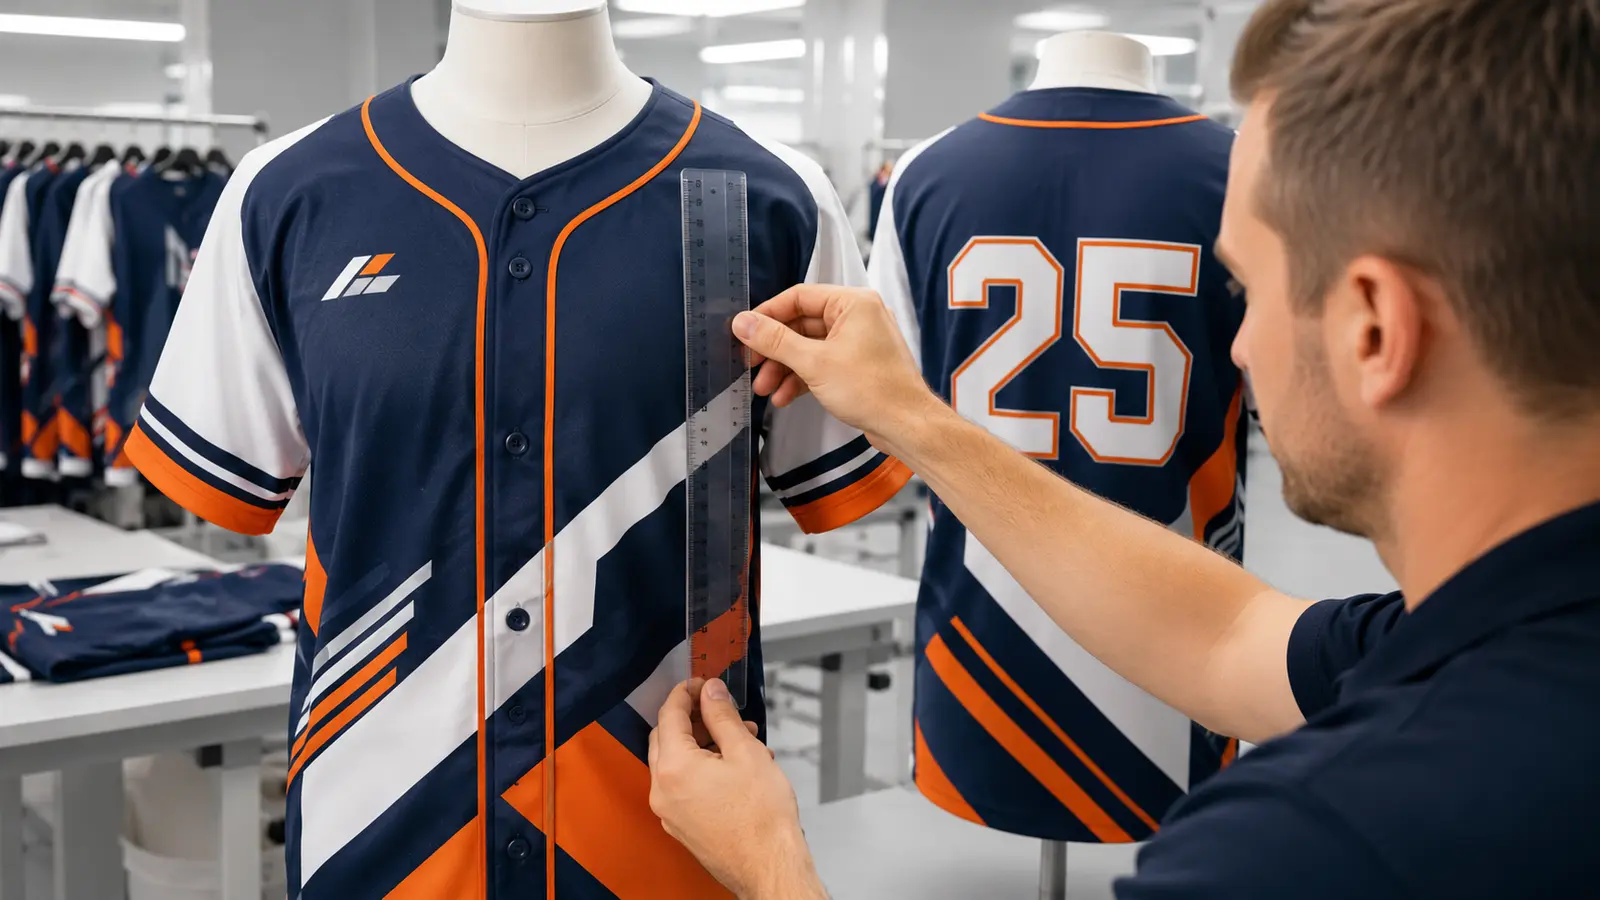
How to Check Print Alignment on Sublimated Jerseys
Sublimation can carry stripes, gradients, player numbers, sponsor logos, and geometric graphics across almost every visible area of a jersey. That freedom creates a practical production question: what does “aligned” mean after flat printed panels are cut and sewn into a three-dimensional garment?
The answer is not simply that every line must meet perfectly. A reliable approval standard identifies which graphics are critical, which pattern pieces they cross, where sewing will consume part of the image, and what project-specific variation the buyer and manufacturer will accept. This guide explains how teams, clubs, brands, and uniform distributors can review alignment before bulk production and inspect it consistently afterward.
A useful alignment review compares the finished garment with approved references, not with an isolated flat artwork file.
Quick Answer
Check sublimated jersey alignment against the actual graded pattern for every ordered size. Approve full-size mockups or production artwork, then inspect a sewn sample for name and number centering, logo position, placket and neckline clearance, and the way priority stripes meet at selected seams. Record reference points and agreed tolerances in writing. Because separate fabric panels stretch, shift during cutting, and are joined along curved seams, exact pixel-perfect continuity across every seam is not a realistic universal standard. The goal is controlled, repeatable placement in the areas that matter most.
Why a Flat Mockup Does Not Fully Predict a Sewn Jersey
A digital mockup communicates design intent, but it does not reproduce every manufacturing variable. The finished jersey begins as pattern pieces: front panels, back, side panels, sleeves, collar parts, cuffs, and sometimes a placket or zipper guard. Artwork is mapped to those pieces, printed onto transfer paper, transferred to polyester fabric with heat, cut, and sewn.
Each stage changes what the eye sees. Seam allowance disappears inside the garment. Curved panels become a three-dimensional torso and sleeve. Fabric can relax or stretch. A sewing operator must feed two layers together while following notches and seam guides. Consequently, a line that meets in the production file can show a small step after assembly.
This does not mean alignment is uncontrolled. It means the control method must follow the garment rather than only the screen. Adobe describes bleed as artwork extending beyond the trim edge to protect against cutting variation; in apparel, the comparable principle is to continue noncritical background art beyond the pattern cut line while keeping critical elements inside a defined safe area. The exact allowance should come from the manufacturer’s pattern and process, not from a generic online template.
The Alignment Workflow: Pattern Before Decoration
The most dependable sequence is:
- Confirm the jersey construction and base pattern.
- Grade that pattern into the required youth and adult sizes.
- Map artwork to every actual pattern piece.
- Define seams, trim lines, notches, fold lines, and safe zones.
- Print, transfer, and cut registered panels.
- Sew panels using the correct construction references.
- Approve the physical sample and record the standard.
- Inspect first pieces and bulk production against that record.
Pattern software used by apparel manufacturers supports grading a base pattern across sizes and comparing piece lengths. Printed-fabric tools also let technicians position pattern pieces over a repeat or engineered graphic and evaluate the result in two and three dimensions. These capabilities help predict placement, but the sewn sample remains the decisive visual proof.
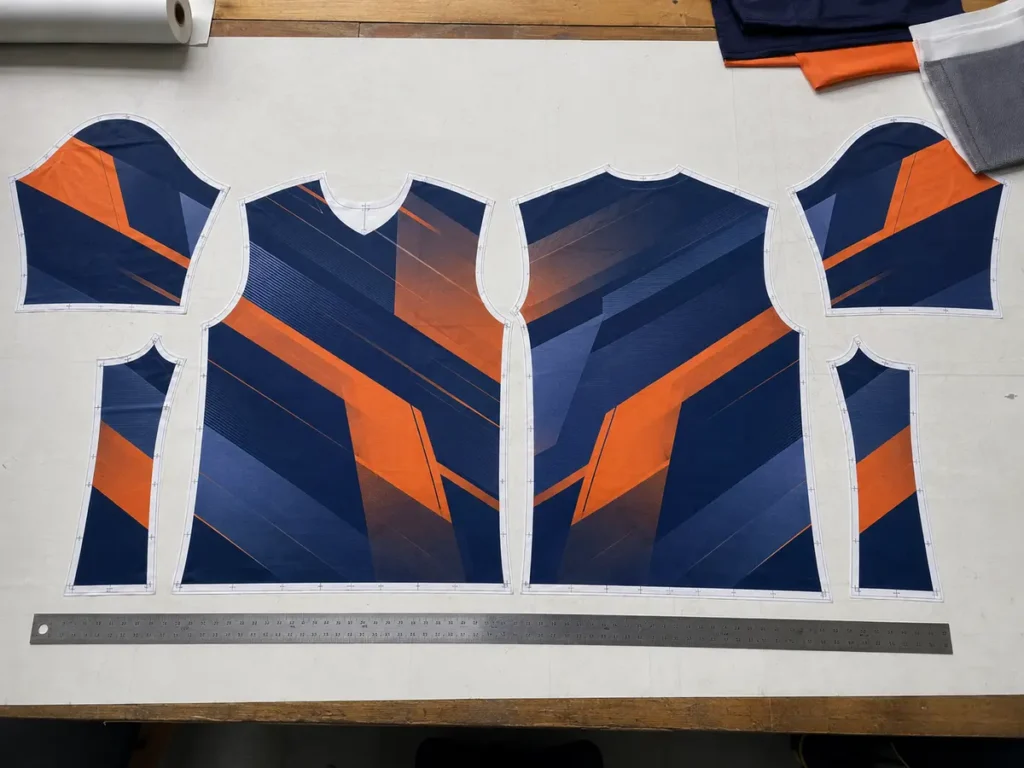
Engineered artwork must be built on production pattern pieces, including seam allowance, notches, and size-specific geometry.
Separate the three approval views
Buyers often receive several files that serve different purposes:
| Approval view | What it proves | What it cannot prove alone |
|---|---|---|
| Concept mockup | Overall visual direction, colors, sponsor hierarchy | Exact finished placement or seam continuity |
| Full-size production artwork | Mapping to pattern pieces, safe areas, scaling, print content | Sewing behavior and final three-dimensional appearance |
| Sewn sample | Finished placement, construction, visual balance, real fabric response | Every possible unit in bulk production |
Approve each view for its intended purpose. A concept mockup should never silently become the dimensional production standard.
Why Graphics Misalign at Seams
Cross-seam graphics join two independently printed and cut pieces. Even when the artwork is correctly engineered, several small variables accumulate.
Seam allowance consumes part of the graphic
The visible edge is not the pattern cut edge. Fabric inside the seam becomes hidden. If a stripe is placed without accounting for the intended seam line, the visible ends may not meet after sewing. The production artwork should distinguish the cut line, stitch line, and visible finished boundary.
Fabric is flexible
Polyester jersey fabric can distort during transfer, handling, cutting, and sewing. Stretch fabrics are especially sensitive to uneven feed or tension. A technician can control the process, but fabric does not behave like rigid printed board.
Cutting position can shift
The transferred image must correspond to the correct pattern position. Registration marks, stable spreading, correct cutting methods, and piece identification help. If the panel shifts before or during cutting, every downstream placement on that panel shifts too.
Sewing joins curved shapes
An armhole, sleeve cap, side panel, and shaped torso do not join as a straight two-dimensional line. Operators use notches and balance points to distribute the fabric correctly. If too much attention is given to one decorative line, the garment construction itself can become distorted. Fit and seam quality remain primary.
Multiple tolerances can stack
Print position, transfer behavior, cut position, seam allowance, and sewing feed each contribute variation. A specification should therefore identify the finished measurement or visual reference that matters, instead of assigning a universal tolerance to one isolated operation.
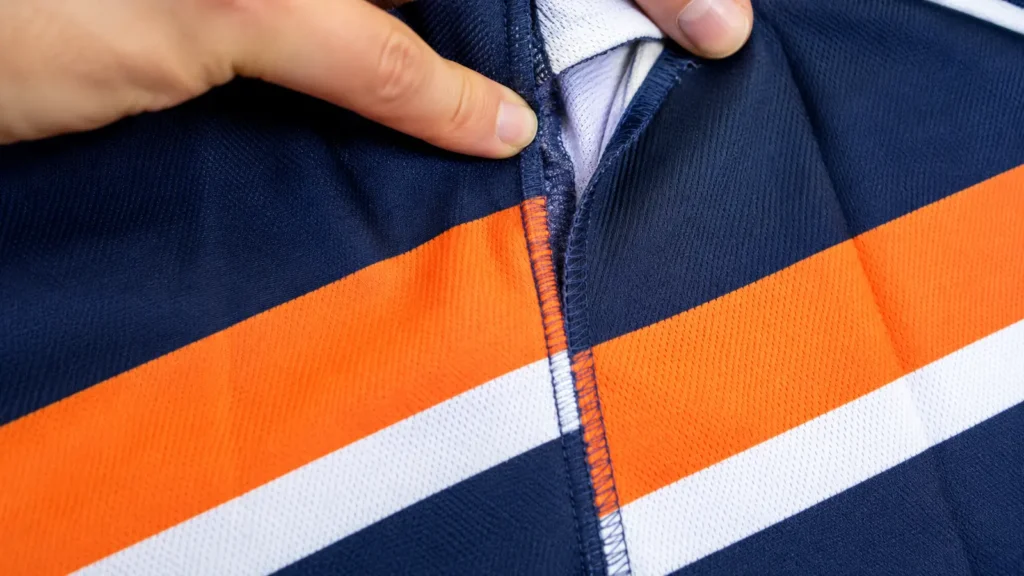
A cross-seam stripe can be a priority match point, but the approval should define how and where it is evaluated.
Can Stripes Match Perfectly Across Every Seam?
They may appear very close at selected reference points, but manufacturers should not promise mathematically perfect continuity across every size, seam, and unit. A garment moves, stretches, and curves around the body. Even a visually exact match while flat may look different when worn.
A better specification ranks alignment zones:
| Priority | Typical area | Recommended control |
|---|---|---|
| Critical | Center-front crest, main sponsor, player number, placket split graphic | Fixed reference point or approved finished measurement |
| High | One selected side stripe junction, sleeve band at underarm, back neck mark | Named match point plus approved visual range |
| Standard | Repeating texture, camouflage, gradient, background pattern | Overall continuity; no obvious isolated jump |
| Non-match | Hidden seam allowance, underarm underside, collar interior | No cross-seam continuity commitment |
This hierarchy protects brand-critical elements without creating an impossible requirement around the entire garment.
Build Safe Zones Around Plackets, Zippers, Necklines, and Cuffs
Construction features interrupt artwork. A baseball placket splits the center front and may overlap. A quarter zip introduces tape and teeth. A V-neck removes part of the front panel. Cuffs and hems fold. These areas need an explicit safe-zone strategy.
Plackets and button fronts
Decide whether a center-front graphic should:
- sit completely to one side of the placket;
- be centered visually over the closed placket;
- split intentionally across the opening; or
- stop before the placket safe zone.
If a wordmark crosses a button front, letters may be interrupted by overlap, buttons, buttonholes, or the natural opening between panels. Review the design both closed and slightly open. The approved reference should state which condition controls.
Zippers
Zipper tape and teeth create a permanent interruption. A graphic crossing a zipper should be designed as two coordinated halves, with enough visual forgiveness that a small vertical or horizontal shift is not distracting. Fine text, small circular marks, and faces are poor choices directly over a zipper.
Necklines and collars
Keep names, crests, sponsor marks, and fine border lines clear of neckline cut lines and collar seams. A mark centered in a rectangular artwork box may not look centered in the curved visible chest area. Judge it on the finished neckline.
Sleeve cuffs and hems
Artwork close to a fold may roll to the inside or vary with the finished fold depth. Bands that appear to continue around a sleeve should have a defined reference at the visible outer arm or another priority point. The underarm seam may remain a secondary zone.
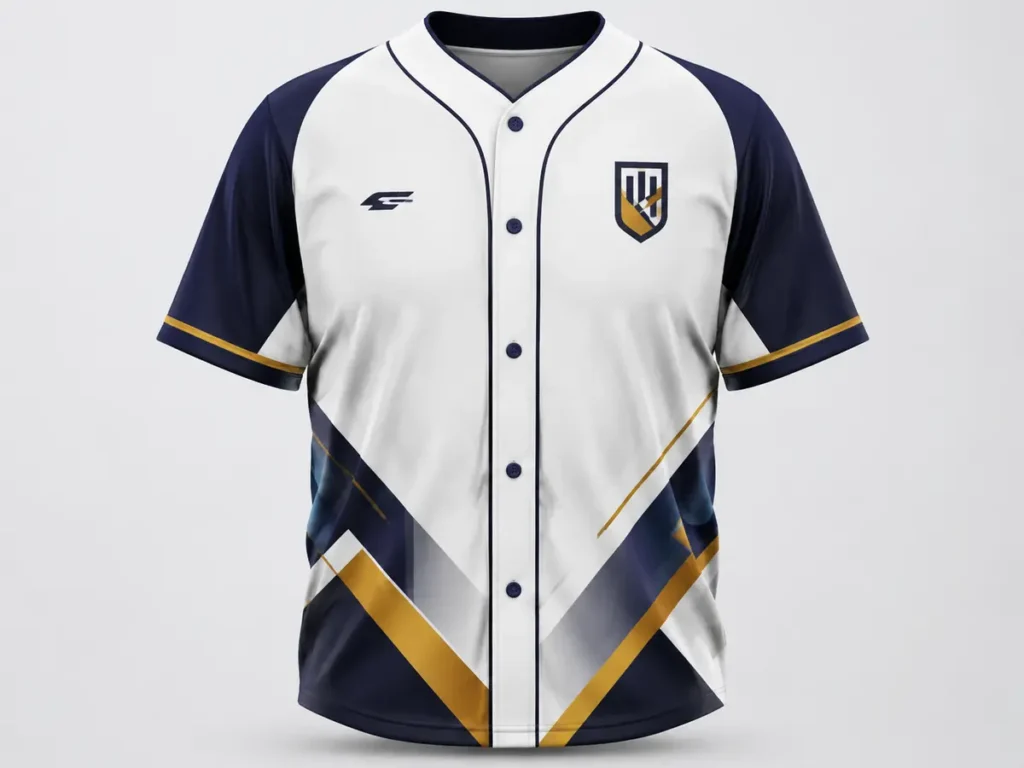
Design important text and logos around construction interruptions instead of assuming every printed area remains visible.
Check Front, Back, Side, and Sleeve Connections Separately
One broad instruction such as “all graphics aligned” is difficult to inspect. Break it into named joins.
Front-to-side and back-to-side joins
Choose the height where a stripe or geometric block should meet. Measure from a stable finished point, such as the underarm seam intersection or bottom hem, rather than from an unsewn cut edge. If the jersey has tapered side panels, expect the apparent angle to change across sizes.
Shoulder seams
Shoulder art crosses a strongly curved body area. A continuous line may look straight when the jersey lies flat but bend when worn. Usually the best approach is to keep key logos away from the seam and treat shoulder patterns as coordinated rather than pixel-continuous.
Sleeve-to-body joins
Sleeves rotate and hang differently depending on fit and arm position. Define whether the main objective is an outer-arm visual, an underarm junction, or a horizontal band when the jersey is laid flat. Do not use all three as simultaneous fixed standards unless the construction genuinely supports them.
Collar and cuff joins
Small circumference pieces have their own seams. Place the closure or artwork break in an inconspicuous area. If a collar stripe must meet the body graphic, approve the finished relationship on the sample.
Center Names and Numbers on the Finished Garment
Player decoration should be centered to the finished jersey, not merely to the bounding box of a flat panel. On the back, check the number against the finished side seams or center-back reference. Confirm the distance from the collar seam and the relationship between player name, number, and hem.
On the front, a placket, asymmetric panel, sponsor mark, or V-neck can make mathematical centering appear visually off. The specification should state whether placement is geometric or optical and show the approved sample.
For every roster, verify:
- exact display name and character sequence;
- player number, including leading zero rules;
- number of digits;
- font and outline layers;
- name arc or straight baseline;
- fixed or size-scaled height;
- placement reference for each jersey construction;
- exceptions for goalkeeper, captain, sponsor, or league marks.
The approved player data should come from one locked roster version. Our Roster Checklist explains how to control names, numbers, sizes, and revisions before production.
Does Artwork Change by Jersey Size?
Yes, but not every element should scale in the same way. Pattern geometry changes across sizes, so the artwork must be reviewed on each graded pattern. A Youth XS and Adult 3XL cannot simply share one image enlarged by a single percentage.
Three useful scaling rules
| Element | Common approach | Approval question |
|---|---|---|
| Brand crest or league logo | Fixed finished size within a size group, sometimes reduced for youth | Does it stay within the chest safe area? |
| Player name and number | Size-group rules or controlled proportional scaling | Is it legible and visually balanced on every size? |
| Full-body stripe or geometric field | Re-engineered to each graded pattern | Do priority junctions and proportions remain consistent? |
Sleeves, armholes, neck drops, body widths, and panel lengths do not grade identically. A graphic that is centered on the smallest size can drift if the larger-size pattern is only scaled from the artwork center. Production files should anchor important elements to garment reference points.
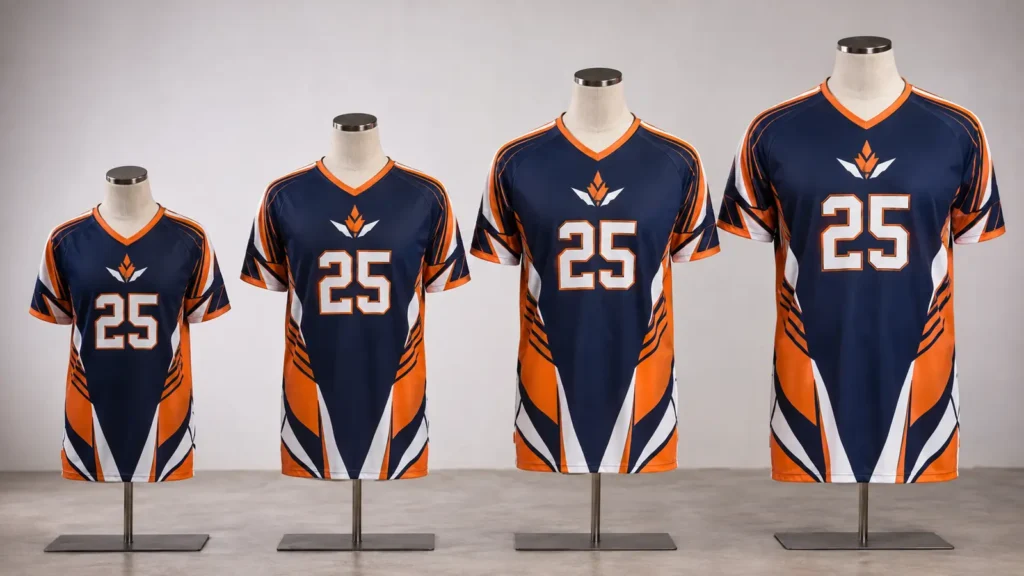
Consistency across sizes means preserving visual hierarchy, not forcing every element to have one identical dimension.
Review every ordered size, not only endpoints
At minimum, inspect the production artwork for all sizes and sew representative samples according to order risk. Orders spanning youth and adult blocks, multiple fits, or very large size ranges deserve more than one physical check. A critical sponsor logo near an armhole may be safe on Medium but crowded on Youth XS.
Cutting Registration and Piece Control
After sublimation transfer, the printed fabric must be associated with the correct pattern and size. Cutting control is central to placement consistency.
Useful production controls include:
- registration or reference marks outside visible artwork;
- clear size and piece identification;
- visible notches that do not damage the finished garment;
- correct fabric grain or stretch direction;
- stable spreading without excessive tension;
- bundle control so left and right or player-specific pieces are not mixed;
- an approved cut panel or first-piece check when risk is high.
Epson’s explanation of dye sublimation describes printing an image to transfer paper and using heat to transfer it into polyester. In apparel production, that transferred image still needs accurate registration to the pattern before sewing. The printer cannot correct a panel that is cut in the wrong position.
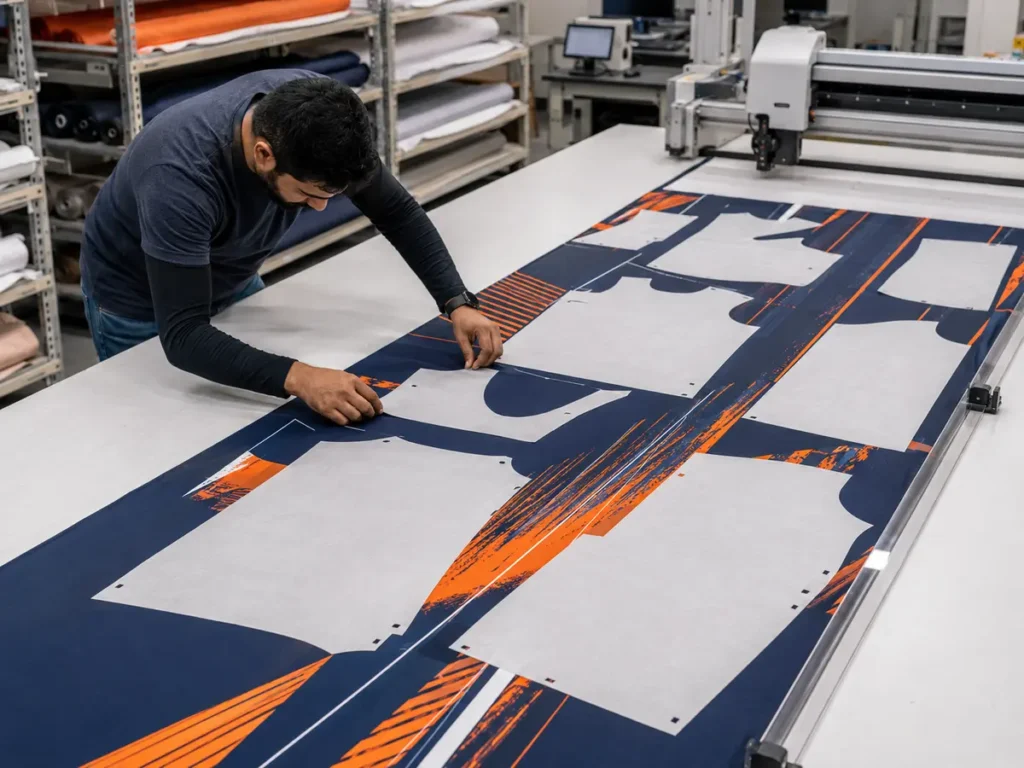
Registration marks, pattern references, and bundle identification connect the printed image to the correct size and player.
Sewing Controls That Protect Alignment
Sewing should follow the garment’s balance points first. Notches, seam allowance, panel ends, and construction specification establish a stable jersey. Decorative match points are then controlled within that structure.
Operators and line inspectors should check:
- correct panel identity and orientation;
- matched construction notches;
- even seam allowance;
- no stretching or gathering at the join;
- correct differential feed and thread tension for the fabric;
- specified stripe or graphic match point;
- placket length, overlap, and closure position;
- sleeve pairing and rotation;
- finished hem and cuff depth.
Pulling one panel to force a stripe into place can create puckering, twisting, or an uneven hem. That is not a quality improvement. The approved standard must balance visual alignment with correct fit and seam performance.
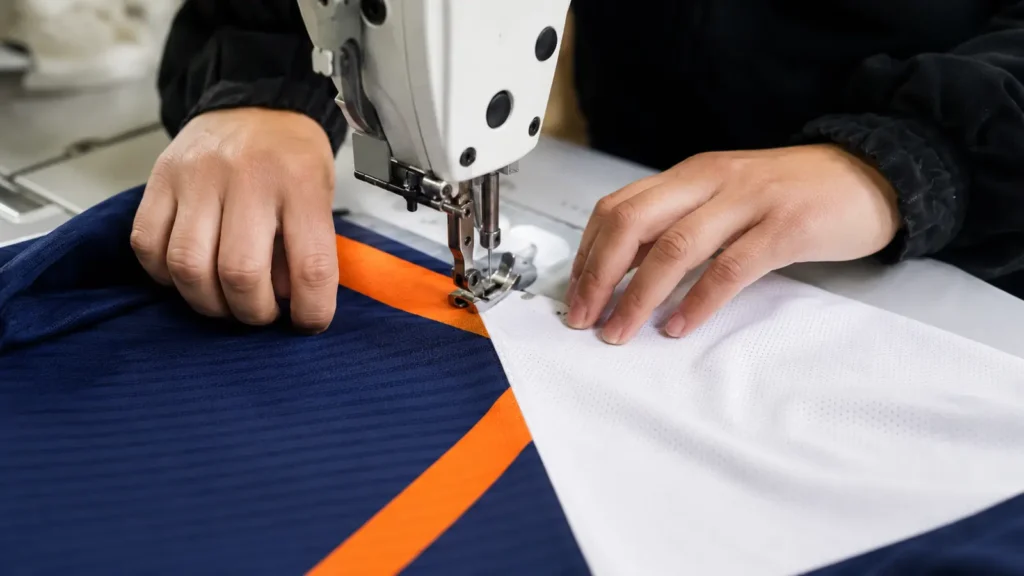
Critical graphic points should be marked in the sewing specification, but they cannot override basic garment balance.
What Tolerance Is Acceptable?
There is no single universal print-alignment tolerance for all sublimated jerseys. Acceptability depends on the graphic scale, fabric stretch, seam type, garment construction, size range, viewing distance, and brand requirement. A tiny displacement is more visible in a one-pixel line than in a broad gradient.
Instead of copying an arbitrary number, buyer and factory should agree on:
- the element being measured;
- the finished garment reference point;
- the measurement direction;
- the nominal target;
- allowed plus/minus variation;
- the sizes or size groups covered;
- whether visual approval also applies;
- the lighting and garment condition for inspection;
- the sampling plan and disposition rule.
For a stripe at a side seam, the record might identify the top edge of the stripe at a named seam intersection. For a back number, it might identify the number’s center relative to the finished side seams and its top distance from the collar seam. These are examples of measurement logic, not preset tolerance values.
ISO publishes standards related to clothing size designation, seam types, stitch types, and dimensional change, but those do not create one universal decorative alignment limit for every custom jersey. Your signed product specification remains the commercial reference.
Full-Size Mockup, Sample, First Piece, and Bulk Inspection
Alignment control works best as a sequence rather than a final surprise.
1. Full-size artwork review
Review each size on production pattern outlines. Confirm critical elements, safe zones, cross-seam priorities, bleed/background extension, and player-variable data. Mark whether dimensions are fixed, scaled by group, or re-engineered per size.
2. Physical sample approval
Inspect the sewn jersey flat, on a mannequin, and—when fit matters—on a suitable wearer. Photograph front, back, both sides, shoulders, sleeves, neckline, placket, cuffs, and any risk seam. Record pass, revise, or reject for each checkpoint.
3. Pre-production or first-piece check
The first bulk piece confirms that the approved artwork, pattern, material, cutting setup, and sewing instructions are correctly linked. It is especially valuable when the sales sample was produced in a separate sample room or when production files changed after approval.
4. Bulk inspection
Inspect a defined sample from production across sizes and player variants. Include units from different cartons or production intervals when practical. Compare against the signed specification and approved sample, record actual findings, and identify affected sizes or player IDs.
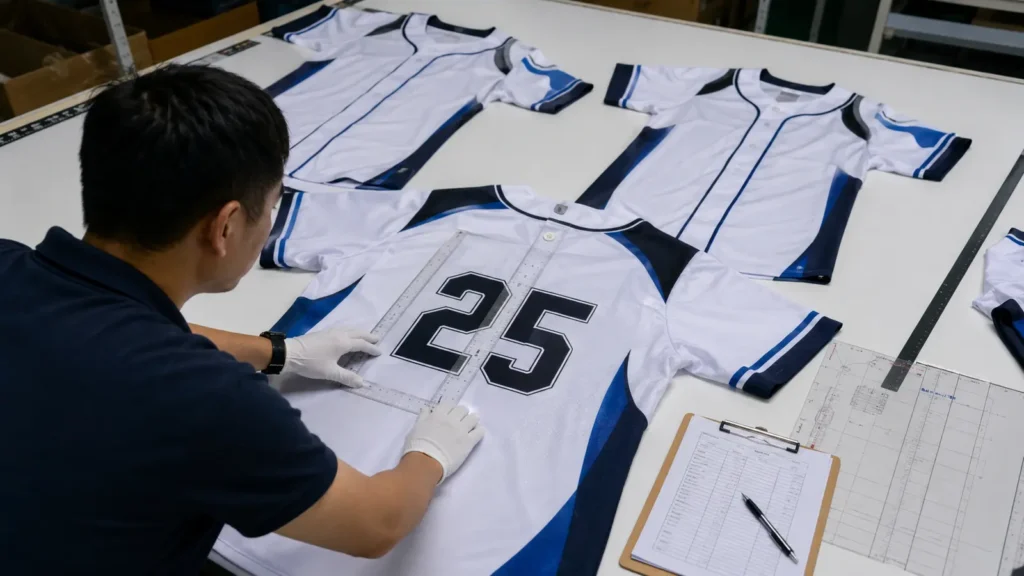
Bulk inspection should sample sizes and personalized variants, not only repeat the easiest standard jersey.
For broader manufacturing controls, see our Quality Control process and Sublimated Jerseys capabilities.
Need an alignment standard your supplier can actually inspect?
Send the jersey construction, size range, artwork, roster, and priority match points. JIUMU can help translate the design into a pattern-based sample and written approval checklist before bulk production. Discuss Your Sublimated Jersey Project.
A Practical Print Alignment Specification
Before approving production, complete a table like this:
| Field | Required record |
|---|---|
| Order and design ID | Purchase order, design code, revision, date |
| Garment construction | Sport, fit, panel arrangement, collar/placket type |
| Size range | Every youth/adult size and fit block |
| Critical elements | Crest, sponsor, name, number, selected stripe junctions |
| Reference points | Finished seams, collar seam, hem, garment centerline |
| Safe zones | Neck, armhole, side seam, placket, zipper, cuff, hem |
| Scaling rule | Fixed, size-group, proportional, or re-engineered |
| Tolerance | Project-specific target and allowed variation |
| Visual standard | Approved sample and dated photos |
| Inspection | First piece, sample quantity, checkpoints, disposition |
| Approval | Buyer and supplier names, date, locked revision |
The downloadable package accompanying this article includes a CSV version that buyers can adapt.
Artwork Safe-Zone Checklist
Ask these questions before printing:
- Are all logos and text inside the size-specific visible area?
- Is background art extended far enough for the approved production process?
- Are placket, zipper, neckline, armhole, cuff, and hem interruptions shown?
- Are cross-seam graphics assigned a named priority point?
- Are non-match areas clearly identified?
- Has every ordered size been reviewed on its actual pattern?
- Are youth and adult artwork rules separate where necessary?
- Are player names and numbers linked to the locked roster?
- Are sponsor and league marks within their required dimensions?
- Are thin borders, small text, and circular logos protected from seam distortion?
- Does the sample approval identify the design revision?
- Are old mockups removed from the active production folder?
Common Alignment Mistakes and Better Controls
| Mistake | Why it fails | Better control |
|---|---|---|
| Approving only a front mockup | Side and back joins remain undefined | Review all pattern pieces and a sewn sample |
| Saying “match all stripes” | No seam or reference point is prioritized | Rank critical, high, standard, and non-match zones |
| Using one artwork scale for every size | Pattern proportions grade differently | Apply fixed, grouped, or re-engineered rules by element |
| Placing a sponsor over a placket | Closures and overlap interrupt the mark | Move it, split it deliberately, or define closed-view approval |
| Measuring from a raw cut edge | The edge disappears into the seam | Measure from a finished seam or visible reference |
| Forcing panels during sewing | Creates twisting or puckering | Preserve construction balance and control match points within it |
| Checking one bulk size only | Problems can be size-specific | Sample across size groups and personalized variants |
| Using an old photograph as the standard | Perspective and scale are unreliable | Keep the approved sample, files, and written measurements |
How Buyers Should Approve the Sample
Use consistent viewing conditions and the same jersey state for every review. Lay the jersey naturally without pulling it into alignment. Check it flat first, then observe how major graphics look on a mannequin or wearer. Photograph from square, repeatable angles with a scale or reference where appropriate.
Record each issue as a specific change. “Move the logo slightly” is ambiguous. A useful revision states the logo ID, current condition, required reference, affected sizes, revised artwork version, and whether a new physical sample is required.
Approve one of three statuses:
- Approved: the sample becomes the production visual reference.
- Approved with documented correction: only low-risk, measurable changes are made and verified as agreed.
- Revise and resample: alignment affects brand appearance, construction, multiple sizes, or a critical graphic.
Keep the approved sample as a Golden Sample with the order number, revision, date, fabric, and signature. The manufacturer should retain the counterpart or an agreed controlled reference. Any approved correction after the sample must be attached to both records.
Baseball Jersey Alignment Needs Extra Attention
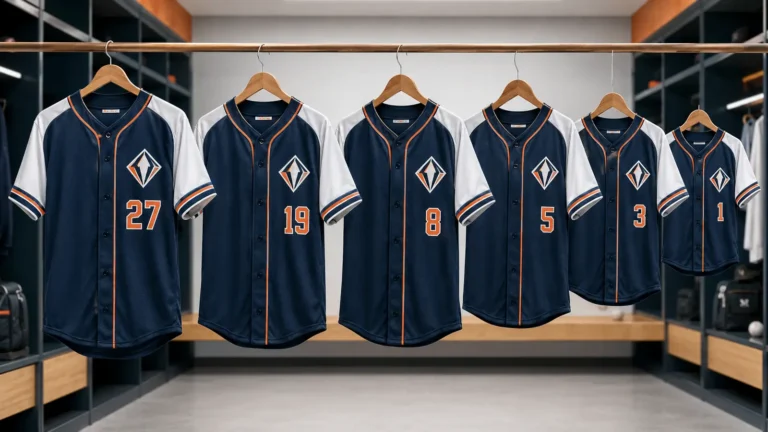
Button fronts, piping, plackets, and chest scripts make baseball jerseys especially sensitive. A diagonal team name may cross a center opening; a chest number may compete with buttons; piping can make a small vertical shift more obvious. Review buttoned and open conditions, confirm which placket edge controls, and specify whether piping is printed or separately sewn.
Our Custom Baseball Jerseys page outlines relevant product options. For a baseball design, include the actual closure count, placket width, neck shape, sleeve style, and size range before the artwork is finalized.
Final Pre-Production Checklist
Do not release bulk production until the following are complete:
- The garment construction and final size chart are locked.
- Production patterns and every ordered size are identified.
- The latest artwork revision is mapped to those patterns.
- Safe zones and background extension are confirmed.
- Critical cross-seam match points are named.
- Fixed and scalable decoration rules are documented.
- The roster revision is complete and signed.
- A physical sample is approved or an authorized exception is recorded.
- The Golden Sample and approval photos are linked to the order.
- First-piece and bulk inspection requirements are written.
- Project-specific tolerances and disposition rules are signed.
- Production uses only the locked files.
Frequently Asked Questions
Conclusion
Good sublimation alignment begins before printing. It comes from a stable pattern, size-specific artwork, defined safe zones, registered cutting, balanced sewing, a physical sample, and a written bulk inspection plan. The most useful question is not “Can every seam be perfect?” but “Which relationships define the design, how will they be measured, and what approved variation is realistic for this construction?”
When those answers are recorded, buyers and manufacturers can make consistent decisions instead of debating photographs after shipment.
Build a production-ready sublimated jersey specification
Share your artwork, sport, jersey construction, size range, delivery plan, and roster with JIUMU. We can review high-risk seam graphics and prepare a sampling path for custom team production. Request a Jersey Alignment Review.
Sources and Further Reading
- Adobe Illustrator: Printer’s marks and bleeds
- Optitex Printed Fabric Tool
- Optitex 2D and 3D CAD Software
- Lectra Modaris pattern development and grading
- Epson: A Digital Printing Primer
- ISO/TC 133 Clothing sizing systems
- ISO textile and seam standards catalogue
About JIUMU
JIUMU supports brands, clubs, schools, and distributors with custom teamwear development, sampling, manufacturing, and quality control. Production specifications should always be confirmed for the selected fabric, construction, artwork, and order.