Custom Jerseys With Sponsor Logos: Placement, Size and Production Guide
Sponsor logos can turn a team uniform into valuable media space, but they also add another approval layer to an already technical product. A logo that looks balanced in a flat presentation can become crowded beside a number, distorted by a seam, hidden by an arm, or noncompliant with a competition rule. The practical solution is not to choose a logo width in isolation. Buyers should define the governing rule, visual hierarchy, safe zone, decoration process, size-scaling method, roster logic and approval sample as one production specification.
This guide is for schools, clubs, leagues, tournament organizers and uniform dealers ordering custom jerseys in mixed sizes. It explains how to plan sponsor placements, compare embroidery, woven patches, PVC patches, heat transfer and sublimation, control player-specific variations, and approve the final result before bulk production.
Quick Answer: What Should Buyers Decide First?
Before a supplier places any sponsor logo, confirm these six items:
- The applicable rule: the sport, league, school and event may each restrict commercial marks, location, quantity or area.
- The priority of every mark: decide how the team crest, sponsor, league badge, player name and number should rank visually.
- The placement safe zone: reserve clear space from collars, plackets, zippers, armholes, side seams, numbers and panel transitions.
- The size system: define a maximum artwork box and state whether Youth, Adult and extended sizes use grouped or proportional scaling.
- The application method: select a process that fits the artwork, fabric, wash requirements, budget and future replacement plan.
- The approval evidence: approve a full-size mockup, decoration strike-off and physical jersey sample—not only an image on a screen.
There is no universal sponsor-logo size that is correct for every jersey. A competition maximum is a legal or policy limit, not automatically the best visual size. The final specification should record both the permitted limit and the smaller production envelope selected for the garment.
Start With Rules, Rights and Sponsor Approval
Logo planning begins with permission, not production. A buyer should confirm that the team has the right to reproduce the sponsor’s trademark and that the intended placement complies with current rules. The supplier can evaluate manufacturability, but it cannot determine whether a sponsor agreement or league regulation authorizes a mark.
Rules change over time and differ by jurisdiction, governing body, division, age group, sport and event. For example, the NCAA announced in January 2026 that Division I schools could add up to two commercial logos to certain uniforms and apparel, with each logo limited to four square inches, effective August 1. That is a useful example of a defined rule, but it is not a universal size standard for youth leagues, schools, clubs, international competitions or other NCAA divisions. Buyers must check the current rulebook and written approvals for their own program.
Create a rule-and-rights record containing:
- Governing body, league, tournament and season
- Sport and uniform component covered
- Permitted number of commercial marks
- Permitted and prohibited locations
- Maximum dimensions or total area
- Required league or school marks
- Sponsor artwork owner and written authorization
- Approval contact and approval date
- Rulebook edition or policy link
If a team will compete under several organizers, design to the strictest confirmed requirement or use a removable sponsor solution for events with different rules. Never assume that a uniform accepted in one competition will be accepted in another.
Where Can Sponsor Logos Go on a Jersey?
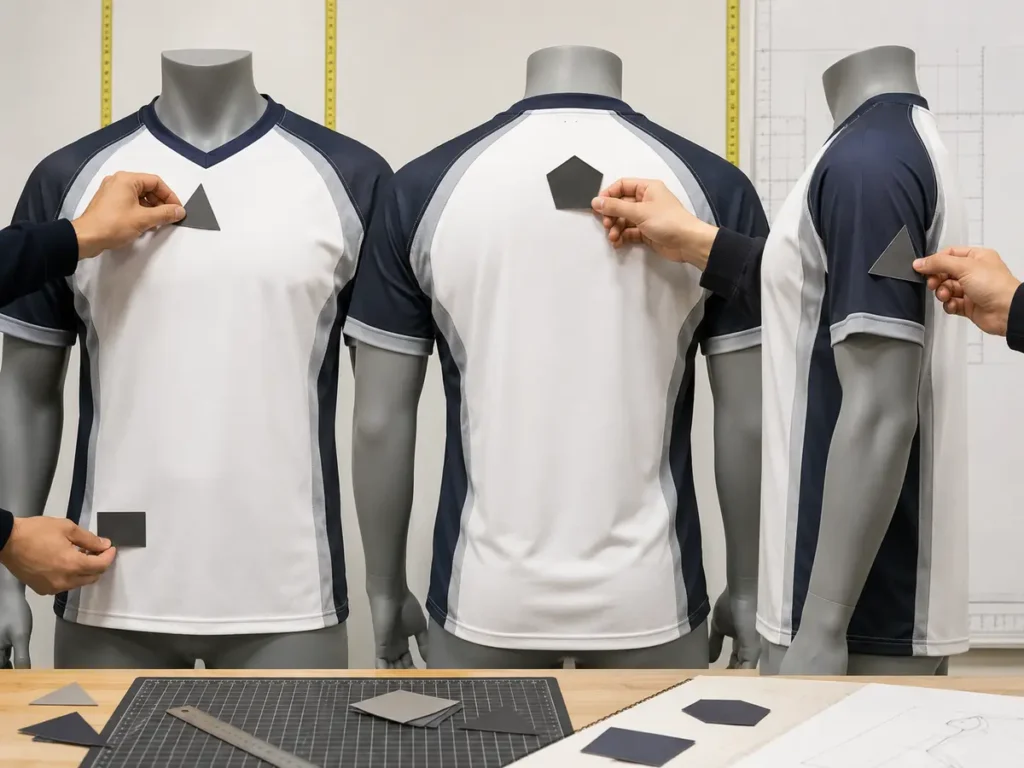
Common commercial areas include the upper chest, opposite chest, sleeve, shoulder, upper back, lower back, side panel and hem. Availability depends on the sport, construction and governing rule. A location that is open on a soccer-style jersey may collide with a baseball placket, basketball number zone, reversible construction or protective equipment.
| Position | Typical advantage | Production risk to check | Good approval view |
|---|---|---|---|
| Center or upper front | High visibility in photographs and broadcasts | Can compete with team wordmark or front number | Full front at actual scale |
| Left or right chest | Compact, familiar badge position | Collar curve, placket and chest crest conflict | Front plus worn-body photo |
| Sleeve | Separates sponsor from front identity | Small printable area, sleeve seam, arm rotation | Sleeve laid flat and on body |
| Shoulder or yoke | Visible in selected angles | Panel curvature and seam crossing | Front three-quarter and rear view |
| Upper back | Strong visibility from behind | Player name and collar clearance | Full back with longest name |
| Lower back | Keeps sponsor below number | Jersey tuck, waistband and garment length | Untucked and intended game use |
| Side panel | Useful as a secondary mark | Underarm obstruction and panel-width variation | Side view in playing posture |
| Hem tab or small patch | Discreet premium treatment | May be tucked in or rub against equipment | Close-up and full-garment view |
Chest and Front Placement
The front normally carries the most important team identity. If the sponsor is centered, the team wordmark may need to move, reduce or become part of a coordinated lockup. If the sponsor sits on one chest, balance it against the team crest, manufacturer mark and any mandatory competition badge.
Sleeve and Shoulder Placement
Sleeves are useful for secondary sponsors, yet their visible area changes when a player bends an arm. The same nominal width can feel large on Youth sleeves and small on extended Adult sizes. Check the artwork against the smallest sleeve pattern in the order. Keep critical text away from the sleeve hem, seam allowance and underarm area.
Back Placement
The back should be planned as a complete stack: collar clearance, sponsor, player name, number and lower-back mark. Test the longest approved player name and the widest number combination, not only a short sample. A sponsor placed above the name may be visible but can force all information downward; a lower-back sponsor can disappear when a jersey is tucked in.
How Large Should a Sponsor Logo Be?
Build the size specification in four layers rather than writing only “logo width 10 cm.”
| Control layer | What it answers | What to record |
|---|---|---|
| Rule limit | What is legally or organizationally permitted? | Maximum area, width, height, count and location |
| Design envelope | What size preserves visual hierarchy? | Maximum artwork box and clear space |
| Garment safe zone | What fits the smallest relevant pattern? | Distance from seams, collar, placket, number and edge |
| Production tolerance | What physical variation is accepted? | Placement and finished-size tolerance agreed with supplier |
A wide wordmark and a square icon can have the same area but appear very different. Specify maximum width and height, plus whether the dimensions refer to the visible mark, patch edge or complete background shape. For an irregular patch, identify the measurement points on a drawing.
Do not enlarge a sponsor merely because space remains. The team identity and number must still read first at the distance relevant to the sport. Review the uniform at three scales: close-up for detail, several meters away for hierarchy, and a small team-photo view for overall consistency.
Fixed, Grouped or Proportional Scaling
There are three practical sizing systems:
- Fixed size: one decoration size across all garments. It simplifies production but may dominate Youth sizes and look weak on 3XL.
- Grouped sizes: one logo for Youth/small Adult sizes and a larger version for larger Adult sizes. This often balances appearance with production control.
- Proportional scaling: a logo is resized for many garment sizes. It can improve visual proportion but creates more files, setup checks and opportunities for version errors.
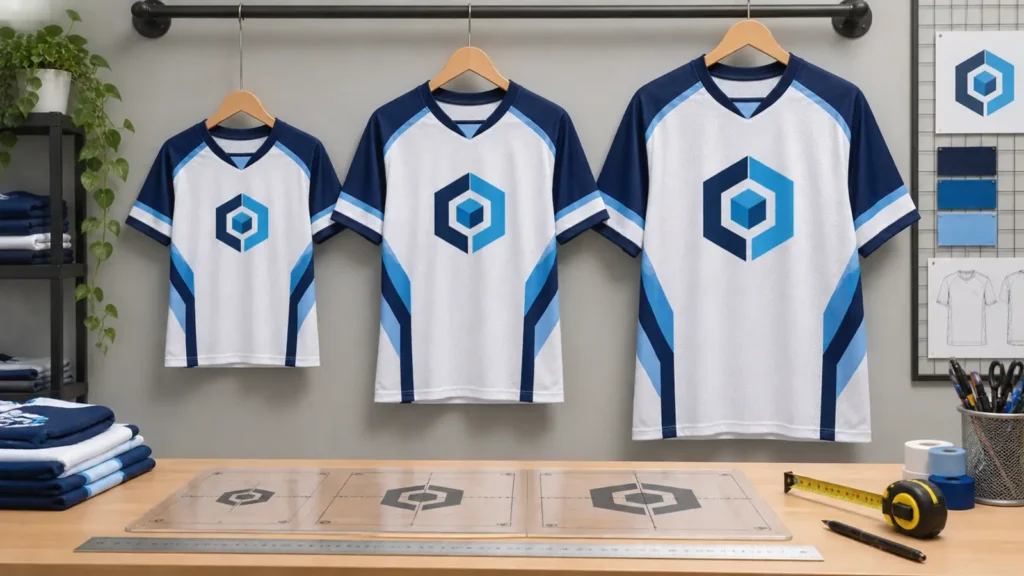
Do not scale logos informally during production. Record a placement code and decoration size for every garment-size group, then link each code to a specific artwork revision.
Prevent Sponsor Logos From Conflicting With Team Marks and Numbers
Visual collision is usually a specification problem, not a printing problem. Make a hierarchy before selecting final dimensions.
A common order is:
- Required competition and safety information
- Player number
- Team crest or team name
- Primary sponsor
- Player name
- Secondary sponsors
- Manufacturer, size and care marks
The order can change under a sponsor contract, but it should be explicit. Use the following collision checks:
- Keep a defined clear zone around front and back numbers.
- Check two-digit numbers and the longest name.
- Keep sponsor text off zipper teeth, plackets and functional openings.
- Avoid placing small text directly across a seam or mesh transition.
- Check how a logo sits when the jersey is worn, not only on a flat template.
- Check contrast against every colorway; a single white logo file may fail on a light away jersey.
- Confirm that embroidery backing, patch edges or transfers do not create uncomfortable stacking.
- Preserve room for required tournament or league badges that may be added later.
For fully sublimated designs, artwork can be integrated into the panel before cutting, but pattern edges and sewing tolerances still matter. A stripe or sponsor element intended to continue across a side seam cannot be guaranteed to align with zero variation. Critical text and borders should remain inside a safe area rather than depending on perfect seam matching.
Which Decoration Method Should You Choose?
The best process depends on fabric, artwork detail, desired texture, order quantity, wash conditions, position and whether the sponsor may change. Ask the supplier for a strike-off using the actual artwork, approximate production substrate and intended application settings.
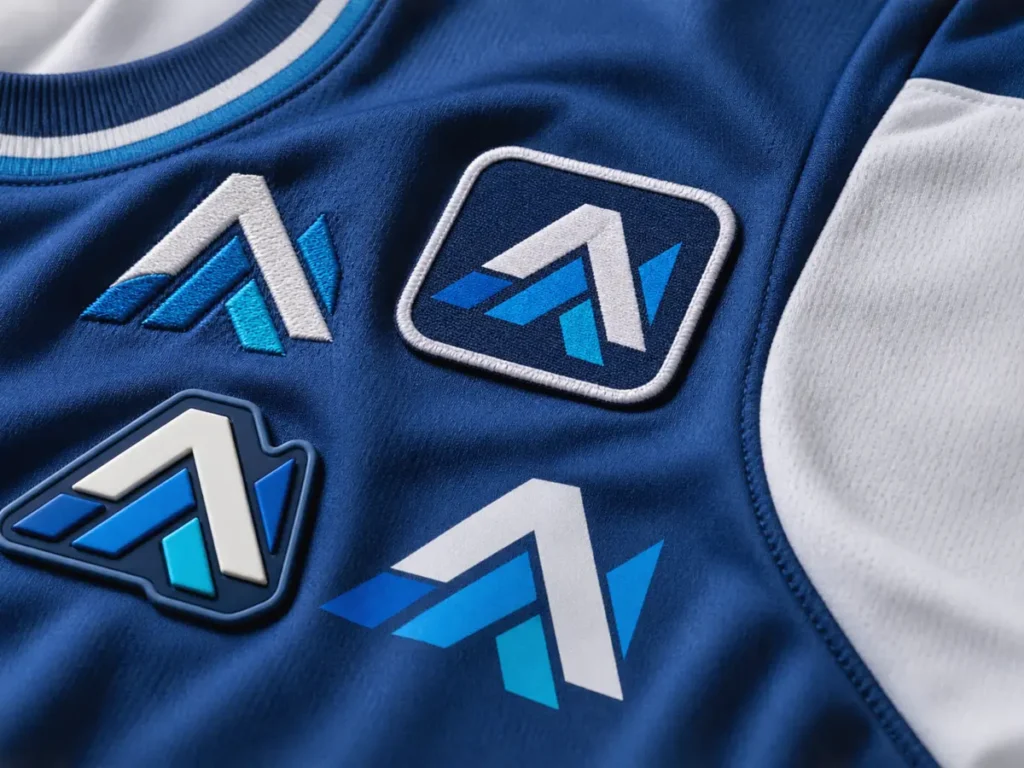
| Method | Best fit | Main strengths | Main cautions | Mid-season replacement |
|---|---|---|---|---|
| Direct embroidery | Small, bold premium marks on stable areas | Thread texture, dimensional appearance, no separate patch edge | Can add stiffness; fine text and gradients are limited; backing matters | Usually requires remaking or visible unpicking |
| Woven patch | Fine lines and smaller text needing a patch format | Higher woven detail than conventional embroidery; clean repeated shape | Edge, backing and attachment must be specified | Possible if sewn as a removable component |
| PVC patch | Bold dimensional icon or rugged visual style | Raised detail, distinctive texture, flexible shape options | Heavier and less breathable; small text limits; sewing method matters | Replaceable if sewn and garment tolerates removal |
| Heat transfer | Detailed, lightweight multicolor marks | Thin, flexible options; good detail; efficient for variants | Film, adhesive, temperature, pressure, fabric finish and washing affect durability | Overlay may be possible but requires testing |
| Sublimation | Polyester jersey panels with permanent integrated graphics | No raised layer; broad color and artwork freedom | Only suitable for compatible materials/process; cannot simply peel off | Usually requires a new panel or garment |
Embroidery
Embroidery creates a tactile, established look and can be highly durable when the digitizing, thread, backing and garment structure are compatible. It is not automatically ideal for a large sponsor block on a lightweight stretch jersey. Dense stitches can reduce drape, cause puckering or feel rough without appropriate backing. Small lettering must be tested at actual size; artwork that is legible on screen may close up in thread.
Woven Patches
Woven patches use fine yarn structures to reproduce small lettering and complex lines more cleanly than many standard embroidered patches. They are useful when a sponsor wants a separate badge appearance without the bulk of dense embroidery. Specify the patch shape, edge, background, backing and attachment. A heat-seal layer can assist application, but whether it is suitable as the sole attachment depends on the fabric, laundering and use; sewing is often selected for a more secure garment attachment.
PVC Patches
PVC can create raised surfaces and custom shapes. It suits bold symbols better than extremely small legal text. Because it is heavier and less breathable than a printed film, test it on the actual jersey location. The patch may pull or curl on lightweight stretch fabric if its size, thickness or stitch perimeter is unsuitable.
Heat Transfers
Heat transfer is a broad category rather than one material. Different films, inks and adhesives behave differently. The factory should confirm fabric compatibility and use controlled temperature, time and pressure. A transfer that is too rigid can change stretch; insufficient bonding can lift at edges; excessive heat can mark or distort the fabric. Include wash testing appropriate to the intended program.
Sublimation
For polyester sublimated jerseys, the sponsor can be part of the printed panel. This avoids a raised layer and supports complex multicolor artwork. Color approval still requires a printed swatch or garment sample because screen appearance is not a final physical standard. Sublimation is also difficult to change after production, so it is less flexible for a sponsor expected to change mid-season.
Can Different Players Use Different Sponsor Details?
Yes, when the competition allows it and the supplier approves the workflow. Player-specific sponsor sets are technically possible, especially with sublimation or transfer processes, but they increase data management, proofing, sorting and QC. The buyer must not communicate these variations through scattered messages.
Use one Sponsor Matrix linked to the roster.
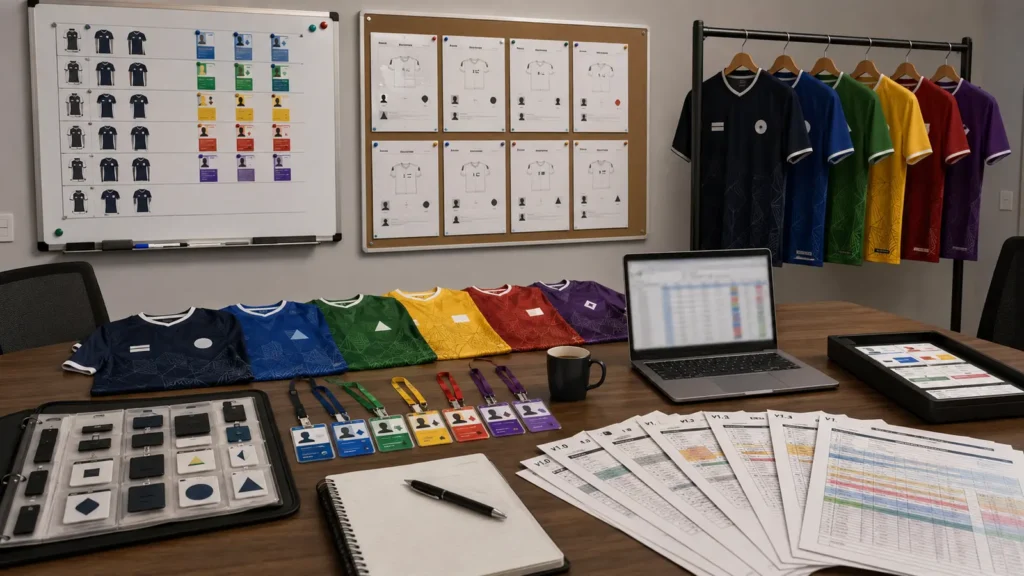
| Required field | Example format | Purpose |
|---|---|---|
| Player ID | P-014 | Stable identity if display name changes |
| Display name | NGUYEN | Exact capitalization and spelling |
| Number | 27 | Detect duplicates and blanks |
| Garment size/fit | Adult M / Athletic | Links to correct pattern and logo scale |
| Colorway | Home Navy | Selects correct logo-color version |
| Sponsor set | SET-B | Links all sponsor positions as one controlled package |
| Placement codes | FR-A / SL-L-2 | Identifies size and location |
| Artwork revision | SP03-R04 | Prevents obsolete artwork use |
| Quantity | 2 | Supports home/away or spare garments |
| Approval status | Approved 2026-09-01 | Documents the locked record |
If top and bottom sizes differ, include separate fields. If different squads, age groups or locations use different sponsors, give each group a sponsor-set code. Personalization may affect setup, MOQ, unit cost and lead time depending on the method and number of unique files; request a quote using the real matrix rather than assuming all jerseys will price as identical pieces.
The Roster Checklist explains how to control mixed names, numbers and sizes. For complete product options, review Custom Team Jerseys and Custom Team Uniforms.
How to Handle a Sponsor Change Mid-Season
The least expensive solution is not always the lowest-risk solution. Decide whether the old mark can remain, be covered, be removed or requires a replacement garment. Obtain sponsor and league approval before altering issued uniforms.
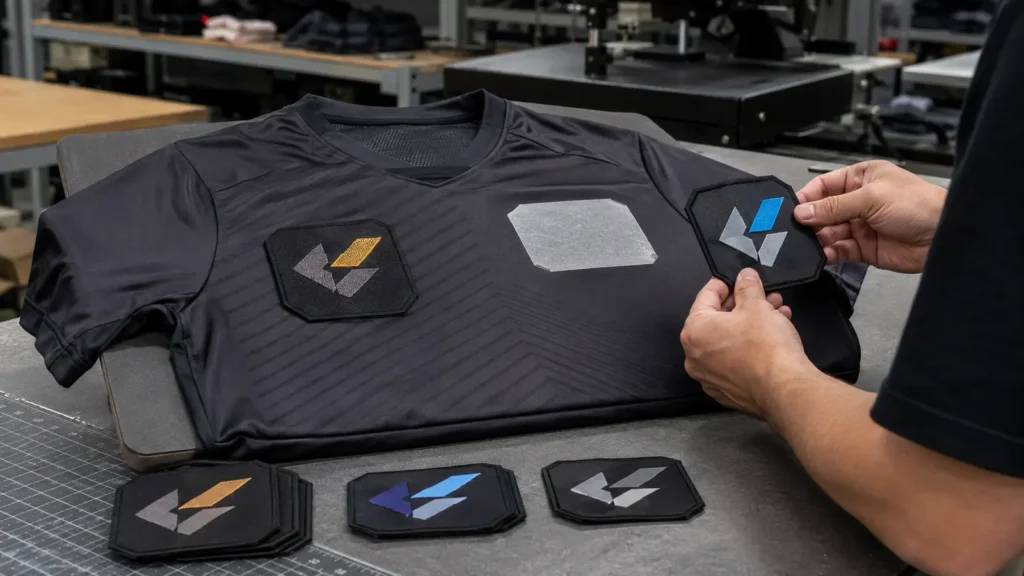
| Production stage | Practical options | Main risk | Required control |
|---|---|---|---|
| Before artwork freeze | Replace files and update all proofs | Old file remains in an email or folder | New revision number and written cancellation of old art |
| After freeze, before printing | Stop affected work if feasible; replan schedule | Materials or screens already prepared | Written change order, cost and date approval |
| Printing or sewing in progress | Separate completed and uncompleted units | Mixed sponsor versions in one shipment | Physical segregation and revised packing list |
| After delivery | Add approved overlay, replace sewn patch or remake | Show-through, adhesive damage, stitch holes, color difference | Tested alteration sample and player-by-player record |
| Future replenishment | Produce new sponsor version | New fabric/print batch may not match old issue | Golden Sample, material record and new first article |
An overlay must be opaque enough to hide the original and large enough to cover it without violating size rules. It can create a visible step, extra stiffness or heat history on the fabric. Removing embroidery can leave holes and marks. Removing a transfer can damage fibers or leave adhesive. A sewn patch designed from the start for replacement offers more flexibility, although repeated unpicking can still mark lightweight material.
For anticipated sponsor turnover, consider separate sponsor panels, controlled sewn patches, or ordering a small number of blank spare jerseys in common sizes. Blank spares are only useful if the later decoration can be applied consistently and if blank inventory is stored and labeled by fabric lot, colorway, size and garment revision.
How to Submit Sponsor Logos
Send production artwork, not a screenshot copied from a website. A complete sponsor-artwork package should include:
- Vector AI, EPS, PDF or SVG files with fonts outlined where appropriate
- A transparent high-resolution PNG for visual reference when useful
- Pantone or other agreed physical color targets
- Positive, reverse and single-color versions
- Minimum permitted size, clear space and trademark guidance
- Sponsor approval contact and reproduction authorization
- Artwork revision number and issue date
- Notes identifying which garment colorways use each logo version
The supplier may simplify tiny text, open narrow gaps, add an embroidery border or modify a patch edge to make the mark producible. These changes require approval. Do not let a low-resolution file become the de facto master simply because it was attached to the latest message.
Create an artwork register with one row per approved file. Include sponsor name, sponsor-set code, placement, process, colorway, final dimensions, file name, revision, approval date and approver. Mark obsolete files clearly and keep them outside the live-production folder.
How to Submit the Roster and Lock Production Data
Use one spreadsheet as the master roster. Assign it a version such as TEAM-2026-R03 and identify the date after which changes need a formal change order. At minimum include Player ID, display name, number, Youth/Adult category, size, fit, colorway, sponsor set, quantity and special notes.
Before approval, run these checks:
- No blank required fields
- Names spelled and capitalized exactly as intended
- Duplicate numbers reviewed rather than automatically rejected
- Youth and Adult sizes explicitly labeled
- Home and away quantities reconciled
- Sponsor sets linked to valid artwork revisions
- Logo placements compatible with each garment size
- Captain, goalkeeper, coach or league identifiers recorded
- Total quantities match the purchase order and packing requirements
After the freeze, do not edit cells silently. Submit a change log showing the old value, new value, reason, affected Player ID, requester and time. The supplier should confirm whether the change can be included, requires a new delivery group, or cannot be made because production has progressed.
Approve the Jersey Before Bulk Production
A digital mockup is necessary but not sufficient. It proves the intended layout, while a physical sample proves how the decoration behaves on fabric, panels and a three-dimensional body.
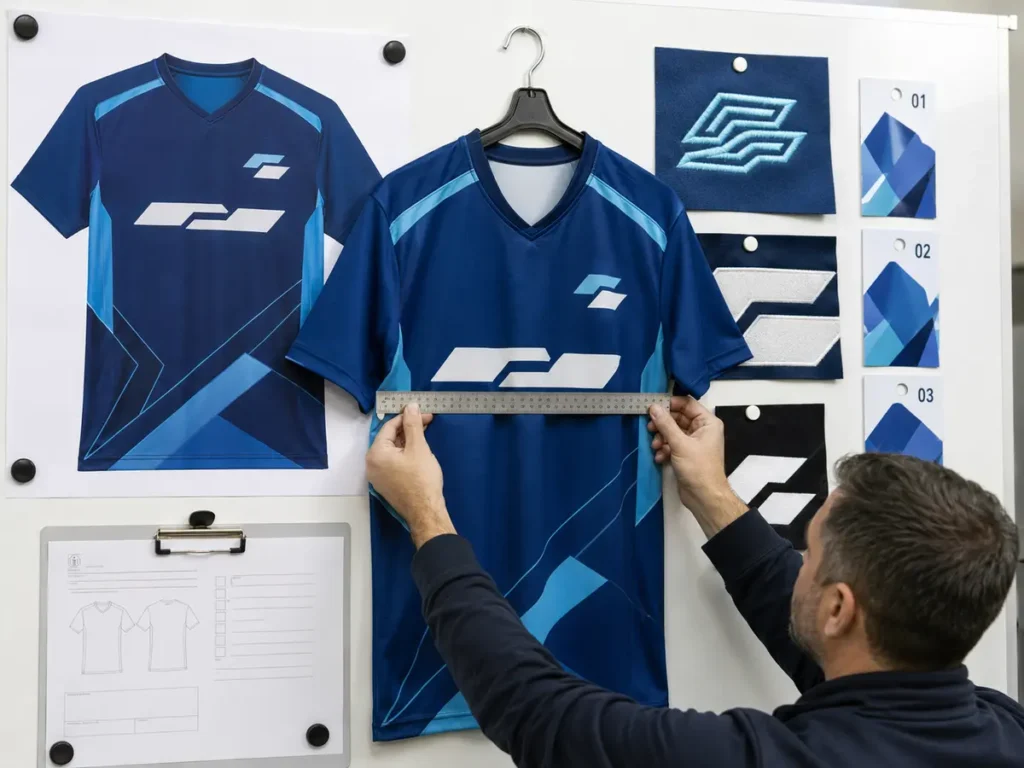
Use this approval sequence:
- Compliance review: confirm current rules, sponsor rights and mandatory marks.
- Artwork proof: approve colors, clear space, logo version and process adaptation.
- Full-size mockup: review front, back, sides and sleeves for every colorway and representative size group.
- Decoration strike-off: evaluate physical size, detail, color, texture, edge and attachment.
- Jersey sample: check placement on the actual fabric and construction, ideally on a worn body.
- Wash or use test: test the decoration and garment according to the intended care and performance requirement.
- Golden Sample: sign, date and version the approved physical sample; buyer and factory should retain or clearly document controlled references.
- First article or preproduction confirmation: verify that the locked files, materials and placement codes have reached production correctly.
- Bulk inspection: sample the order against the approved specification and Golden Sample.
Sponsor Logo Approval Checklist
| Check | Approval evidence |
|---|---|
| Rule and rights | Current policy plus reproduction authorization |
| Artwork | Approved revision in the artwork register |
| Size and placement | Dimensioned mockup and physical strike-off |
| Hierarchy | Full front/back review with longest name and widest number |
| Small sizes | Youth or smallest-size garment sample |
| Process and color | Physical sample under agreed lighting |
| Comfort and durability | Try-on plus agreed wash/use test |
| Roster and bulk | Locked Sponsor Matrix, tolerance and QC plan |
Approval should state: approved for bulk, approved with recorded conditions, or revision required. A message such as “looks good” is insufficient without a file name, revision and scope.
For broader manufacturing controls, see Quality Control. Buyers planning a complete baseball program can also review Baseball Team Uniform Packages.
What Is Needed for an Accurate Quote?
Provide enough information to price the actual variation count:
- Sport, jersey type, fit and quantities by size/colorway
- Sponsor count, positions, artwork and color standards
- Preferred process and performance priority
- Sponsor-set matrix and roster complexity
- Required arrival date, sample and testing requirements
- Packaging, sorting, replenishment and sponsor-change plan
JIUMU supports OEM and ODM development for teamwear and related branded products. Apparel MOQ commonly starts from 50 pieces, subject to garment structure, decoration and variation count. Jersey samples commonly require about 7–10 days after requirements are confirmed; standard bulk production may be approximately 25–30 days, while complex orders can require 35–45 days. Shipping, customs, peak periods, holidays, sample revision and approval time are additional. Treat the current written quotation and production schedule as authoritative for a specific project.
For a coordinated program, contact JIUMU with the jersey brief, sponsor artwork, roster and required delivery date.
Build the sponsor system before production files multiply. Send JIUMU your sport, uniform quantity, sponsor positions, logo files and roster structure for a manufacturability review and quotation. Explore Custom Team Jerseys or a complete Custom Team Uniforms program.
Common Sponsor-Logo Ordering Mistakes
- Treating a league example as a universal rule.
- Ignoring the smallest Youth garment when sizing logos.
- Positioning sponsor art before numbers and team marks are locked.
- Using screenshots instead of controlled vector artwork.
- Circulating several roster files without one master version.
- Approving a flat mockup without a physical decoration sample.
- Covering an old mark without testing show-through or damage.
- Assuming a later replacement will be indistinguishable from the original batch.
Frequently Asked Questions
Final Recommendation
A successful sponsor jersey is a controlled system, not a logo dropped into empty space. Confirm the rule and rights first, then build the hierarchy, safe zone, size groups, process and Sponsor Matrix. Approve physical evidence before bulk production and preserve the artwork register, roster version, placement diagram and Golden Sample for replacements.
JIUMU has supported custom teamwear, hats, bags and branded merchandise since 2010 in Guangdong, China. To discuss a sponsor-ready jersey or team package, visit Contact Us, email zhengdong@jiumugear.com, or call +86 18507502899.
Technical References
- NCAA, “DI Cabinet approves commercial patches for uniforms, equipment and apparel,” January 23, 2026: https://www.ncaa.org/media-center-di-cabinet-approves-commercial-patches-for-uniforms-equipment-and-apparel/
- NCAA sport-specific playing-rules resources: https://www.ncaa.org/championships/playing-rules/
- FIFA official documents and competition regulations: https://inside.fifa.com/official-documents
- Madeira USA, patch production guidance: https://www.madeirausa.com/resources/how-to-make-patches/
- Madeira USA, embroidery backing and heat-seal guidance: https://www.madeirausa.com/resources/embroidery-backing.aspx
About JIUMU
JIUMU supports OEM and ODM custom teamwear, hats, bags and branded merchandise for professional buyers. Established in 2010 in Guangdong, China.